How to Make a Spiral Betty on Cricut (Complete Tutorial)
Easily create Spiral Betty artwork by taking any image and cutting it out on your Cricut. No printer needed, just weed the single strand and watch the magic happen.
This post contains some affiliate links for your convenience (which means if you make a purchase after clicking a link I will earn a small commission but it won’t cost you a penny more)! Read my full disclosure policy.
Materials Needed to Make a Spiral Betty with Cricut
- Standard Grip Mat (the 12″x 12″ size)
- Iron-on Vinyl/Heat Transfer Vinyl (HTV) OR Permanent/Removable Vinyl (Oracal brand recommended)
- Painter’s Tape (if using permanent/removable vinyl)
Get free SVG design files (available in my free resource library – get the password by filling out the form on the sidebar or below).
Spiral artwork like the Spiral Betty have been around for a while but only recently after trending on Tik Tok did it blow up in popularity.
The first time that I saw it, I knew I wanted to try my hand at making one.
Little did I know, that it was actually more difficult than I thought if you don’t have the right materials or cut settings on your Cricut or Silhouette machine.
Let me make your crafting time easier and follow my easy step-by-step tutorial to create your own Spiral Betty. I’ve included all of my tips and tricks!
What is a Spiral Betty?
A Spiral Betty is named after the website that takes an image and creates a circular design pattern. The design is a single strand of varying widths that ultimately create the distinct image you used to convert.
The design can then be used for things like colouring pages, or cut with a vinyl cutting machine to be placed on different materials.
It also makes a wonderful personal gift idea. I have a full list of uses below on how you can use your Spiral Betty.
Other Personalized Gift Ideas
➨ DIY Personalized Tile Ornament
➨ Reverse Canvas Fishing Artwork
How to Make the Spiral Betty on a Cricut
If you’d rather watch a video on how to make a Spiral Betty step by step, take a look at this video here (highly recommended!):
STEP 1: Make a Spiral Betty image
Head over to the Spiral Betty website and upload your image.
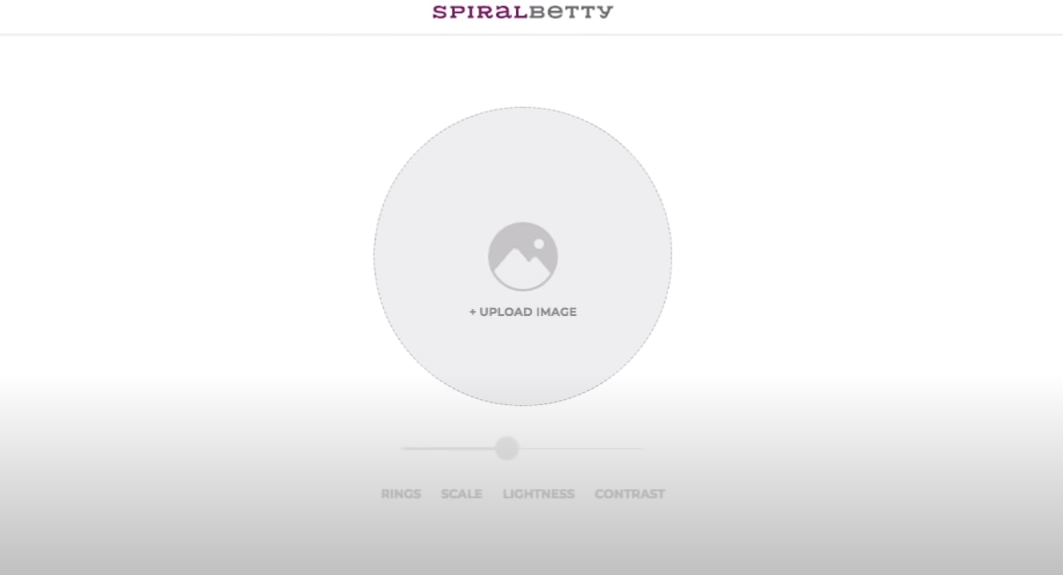
Play with the settings (rings, contrast) to get a better image.
Note that the more rings you have, the more intricate the cuts will be on your Cricut (which will be more difficult to weed).
My rule of thumb is if what you are making is less than 6 inches, then stay below the midpoint of the “rings” bar.
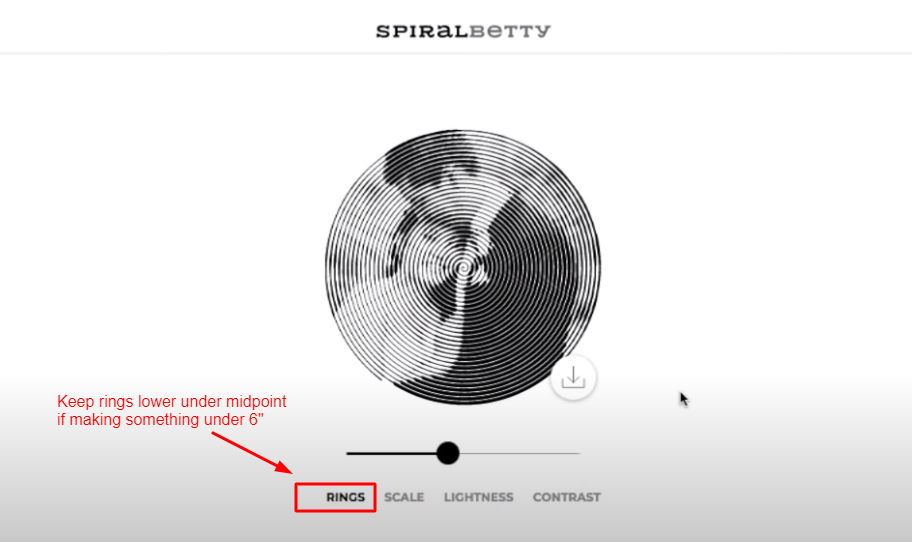
The other thing to keep in mind is the crosshair on the editor is the middle of the image. I recommend that you adjust the photo so this crosshair is NOT on a person’s face. If it is on a person’s face it will be difficult to see once it’s cut.
Finally, I’ve noticed that a better contrast with darker areas will show up better when cut.
The larger the Spiral Betty, the easier it will be to weed.
Once you are happy with your design, download the file as a .PNG
STEP 2: Upload to Cricut Design Space
Open up Cricut Design Space and upload the file you’ve just downloaded.
Select “complex” image.
On the editing screen, take the magic wand tool and click on any white space in the image. This will delete the background so you are only left with the Spiral Betty.
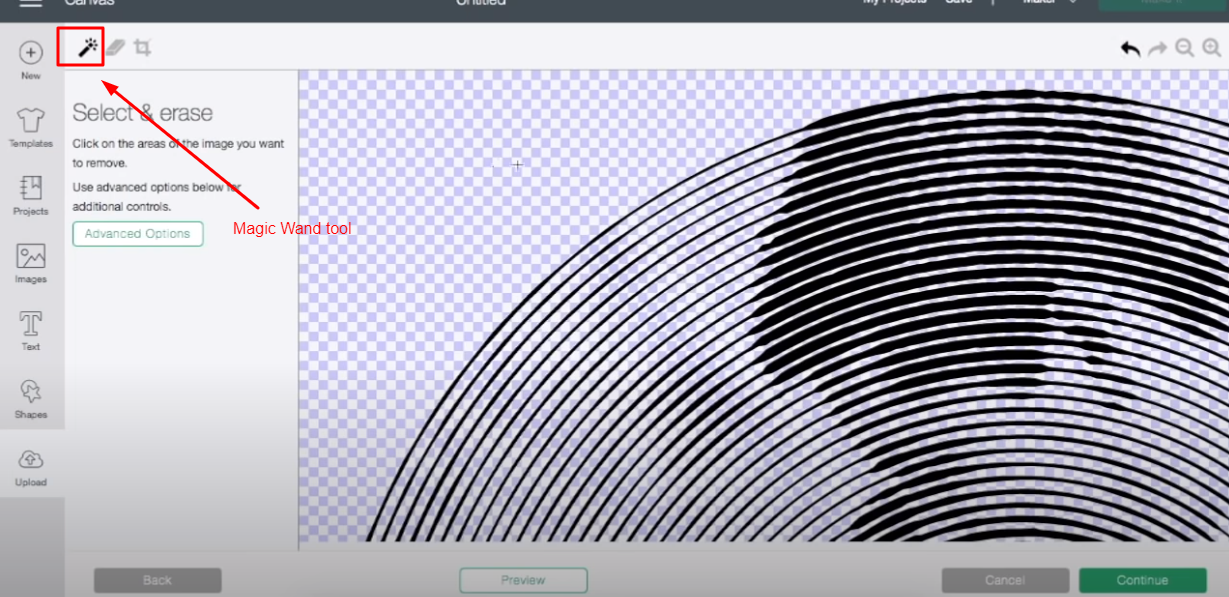
Save this as a “Cut” image.
The image will look a little thick but don’t worry about that because it will cut out fine.
Once you load the image into your canvas, it will be too large.
Resize the image to under 12 inches (or whatever you’d like to cut it at).
STEP 3: Cut out and Weed your Spiral Betty
So let’s talk about materials for a minute.
I’ve tested my Spiral Betty cuts with a few different brands of vinyl.
The easiest type of vinyl to weed for this project is heat transfer vinyl (or Cricut Iron-on).

With heat transfer vinyl, you don’t need to worry about transferring your design to a transfer sheet which means there is less disruption to your design. I highly recommend using heat transfer vinyl for your first project.
For the one I made, I used the Cricut Iron-On setting with Cricut Iron-On. Don’t forget to mirror your image when using heat transfer vinyl.
If you choose instead to use permanent or removable vinyl, here is what I found.
While I generally prefer Cricut brand vinyl (I have so much of it!), it was horrendous to weed in this project. The Cricut brand permanent and removable vinyl kept tearing along the thin lines and kept sticking to other parts of the Spiral Betty.
Then I tried making the exact same cut with Oracal 651. This weeded so well!
For my Oracal 651, I used a custom setting with 140 pressure and my fine point blade.
So what’s the best way to weed your Spiral Betty?
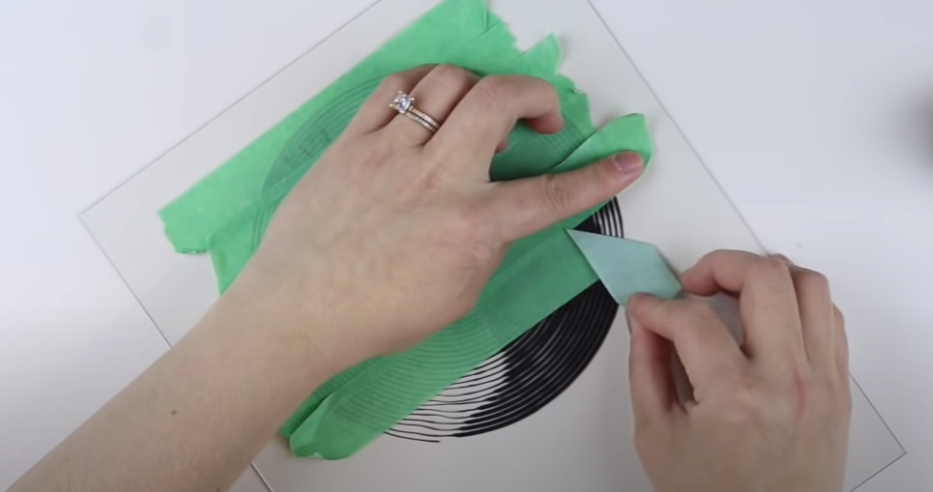
I start from the top and peel off the outer circle of vinyl.
Then I snip the bottom so I have a “tab” left. This ensures that I pull the right circular strand on my spiral.

If you used a good vinyl and cut with good pressure, you should easily peel your Spiral Betty in a circular motion.
I like wrapping this around a few fingers to make it easier and to make sure the “weeded” part of vinyl doesn’t stick to my design and accidentally pull up areas it shouldn’t.
STEP 4: Transfer your Spiral Betty (for permanent or removable vinyl)
If you are using heat transfer vinyl or Cricut iron-on, you just need to flip over your design and iron it on using your iron or heat press to your craft blank.
If you are not using heat transfer vinyl or Cricut iron-on, you will need to transfer your Spiral Betty to your craft blank.
Normally you would use transfer tape to transfer permanent or removable vinyl.
But because of how intricate some of the lines are on the Spiral Betty, I found it easiest to use painter’s tape to transfer the Spiral Betty.
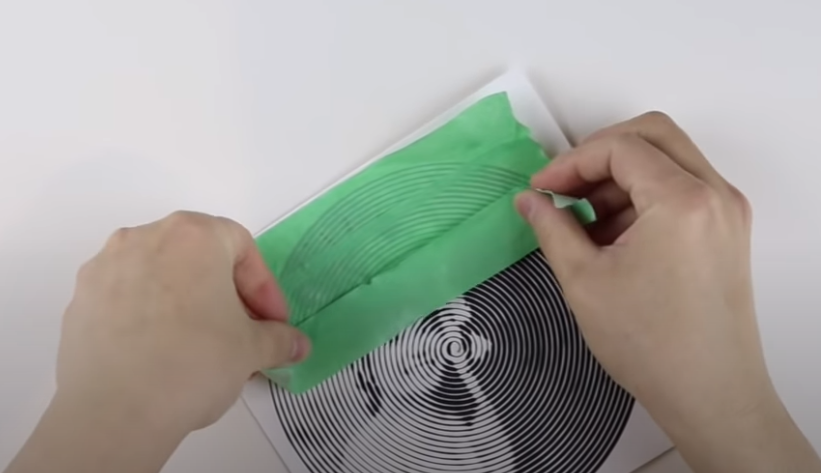
Painter’s tape allows you to take it off in layers so you can make sure your design stays on your craft blank during transfer.
Once you’ve peeled off your painter’s tape, you can double check your vinyl to make sure nothing came up during transfer. If it did, just poke it gently with your weeding tool.

I used my Spiral Betty as part of a Spotify Glass plaque. But here are some other ideas.
Spiral Betty Ideas
- Spotify Glass Plaque
- Iron-on to clothing
- Framed artwork in a shadowbox or other picture frame
- Colouring pages
Frequently Asked Questions
Do I need a printer to make a Spiral Betty?
No, you do not need a printer to make a Spiral Betty.
The magic of the Spiral Betty is that you can use a single colour of vinyl and it will create an image once weeded.
My design keeps tearing, what can I do?
I recommend using heat transfer vinyl for your first project because there is less transferring involved.
If you are struggling to weed, check your settings (I listed mine in the tutorial above) and go VERY slow when you are weeding.
It is normal for the vinyl to rise a bit when you are weeding. You can help keep it in place by holding them down with your fingers while you pull up the vinyl while weeding.
I weeded my design but ended up with just a black circle.
You probably weeded the wrong part. Take a look at my YouTube video to see how I weed this.
I leave a tab so you know exactly where to pull.
Can I make a Spiral Betty using cardstock?
Yes! I’ve tested it using cardstock and it DOES work but you have to make sure the design is fully cut through. Try using the “more” pressure setting on your Cricut to help make sure it’s cut through.
Can I make a Spiral Betty on a Cricut Joy?
Yes, you can but with some adjustments.
The Spiral Betty is easier to weed the bigger it is so using a Cricut Explore Air 2 or Cricut Maker is ideal.
If you are planning to make this on the Cricut Joy, keep in mind that the size of the Spiral Betty needs to be adjusted to fit. You can use my techniques above to creating one on a smaller scale (rings, contrast, etc).
Why does my Spiral Betty look like a photo negative?
If your Spiral Betty looks like the inverse of what it should look like, you probably weeded the wrong strand. Take a look at the tutorial to see how to avoid this.
Crafting Community
If you like this tutorial, join our Facebook community where I post other free SVG files and resources! I look forward to crafting with you!