
How to Make Your Own Yoto Card Cover Stickers Using Cricut
One of my favorite things about the Yoto player is that you can make your own cards. You can record yourself or a family member reading your child’s favorite book, link a card to a podcast, or create music or audio cards from CDs you have a home.
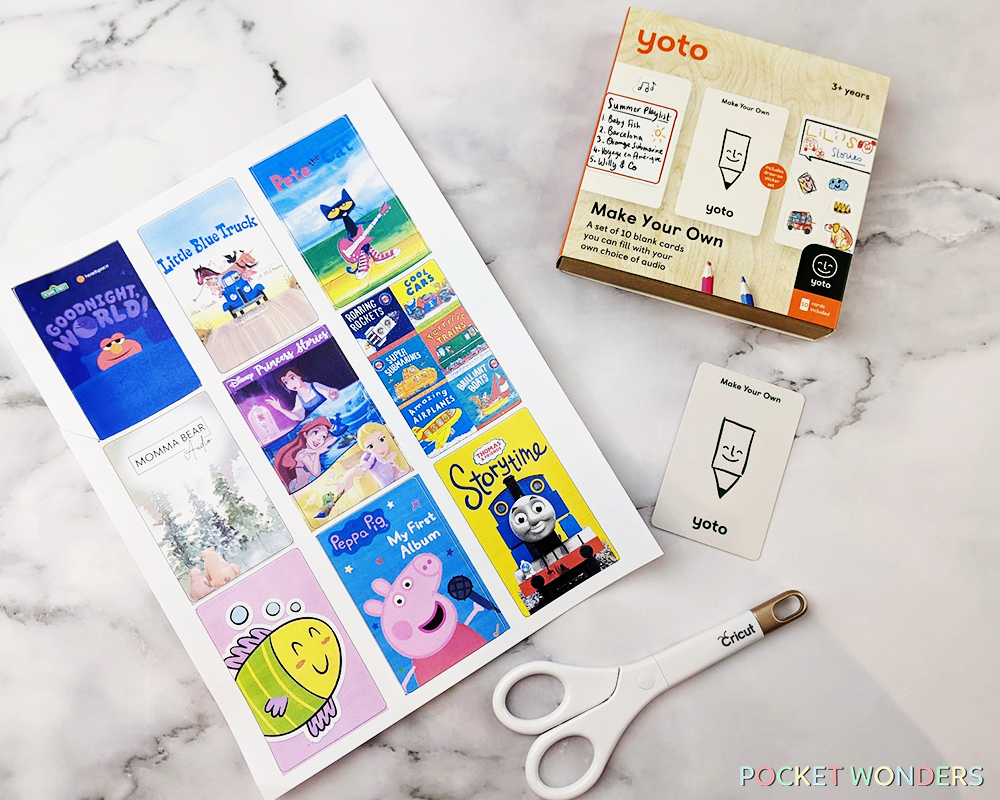
Once you have your audio playlist ready, it’s time to jazz up our cards by adding some card cover art.
This post contains some affiliate links for your convenience (which means if you make a purchase after clicking a link I will earn a small commission but it won’t cost you a penny more)! Read my full disclosure policy.
Materials needed to make your own Yoto card cover stickers using a Cricut
- Cricut Machine
- Cricut Tools
- Cricut Fine Point Blade
- Sticker paper
- My free Yoto card template (available in my free resource library – get the password by filling out the form on the sidebar or below).
How to Make your Own Yoto Card Cover Stickers using Cricut
Step 1: Upload the template
After downloading the template from the free resource library, head over to Cricut Design Space and upload the file.
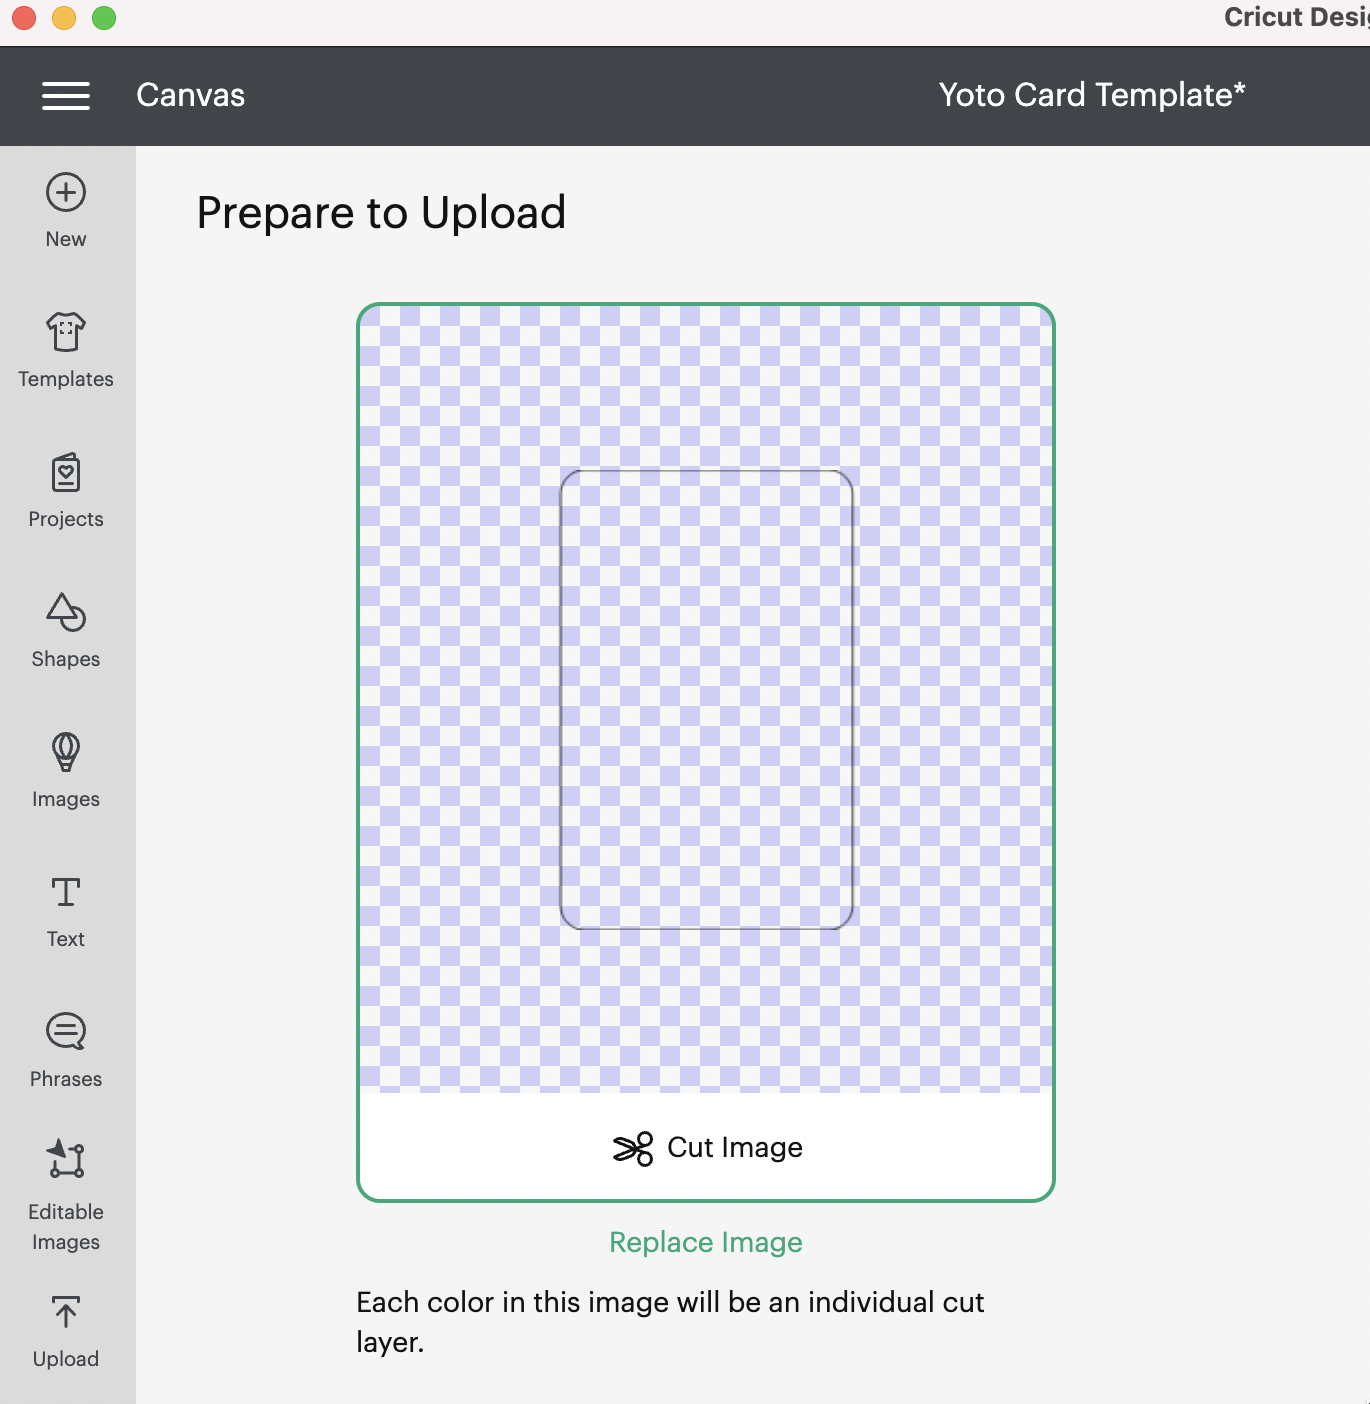
You do not need to resize the file or edit it in any way.
Step 2: Upload your cover art
Next, upload your cover art into Cricut Design space.
You can use Yoto’s default images if you’d like or design your own.
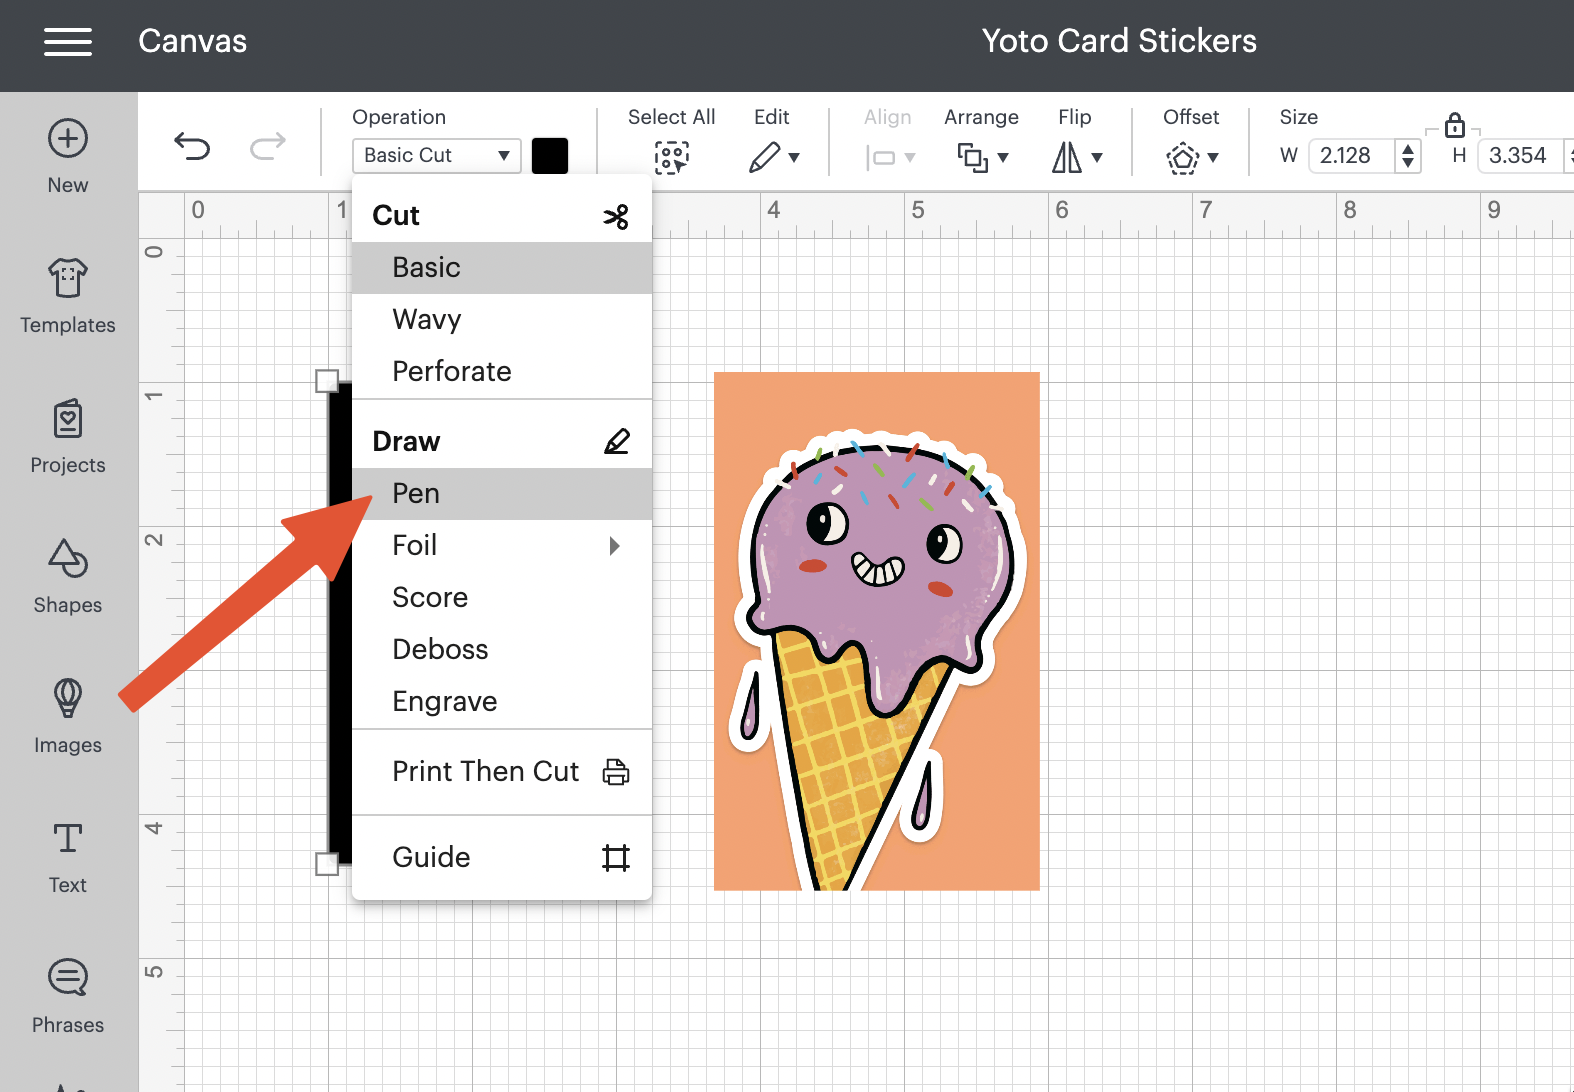
Select the Yoto Template and go to the Operations tab and select “Pen”. You should now see an outline for your Yoto Template layer.
Step 3: Trim your cover art
Lay the template layer on top of the cover art image, making sure the template covers the entire cover image and resizing to fit.
Remember, DO NOT resize the template layer. Only resize the cover image.
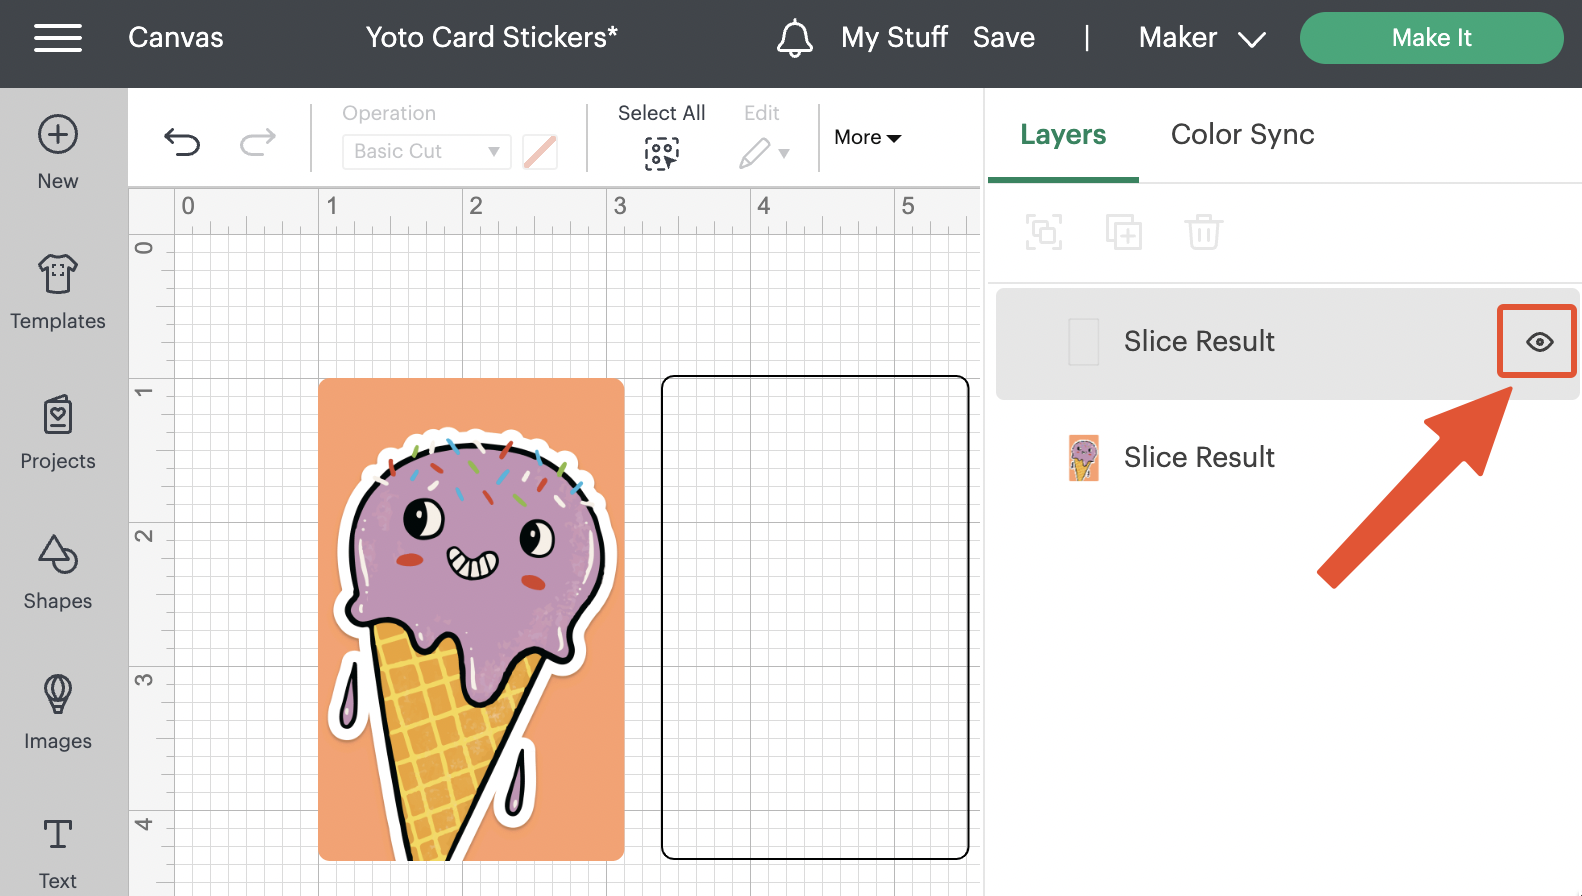
Once you are happy with your resized cover image, select both layers and select “SLICE”.

Delete the excess layer.
You can reuse the Yoto template layer for more cards.
Step 4: Print then Cut your Yoto cover art
Hide the Yoto template layer so it doesn’t try to cut it out.
Click on “Make it” in the top right corner.
Print the cut your Yoto cover art onto sticker paper.
I also like to “laminate” or add a protective clear layer to my cards (you can use transfer tape right on top) to make my cards more waterproof. (Add this BEFORE you cut.)
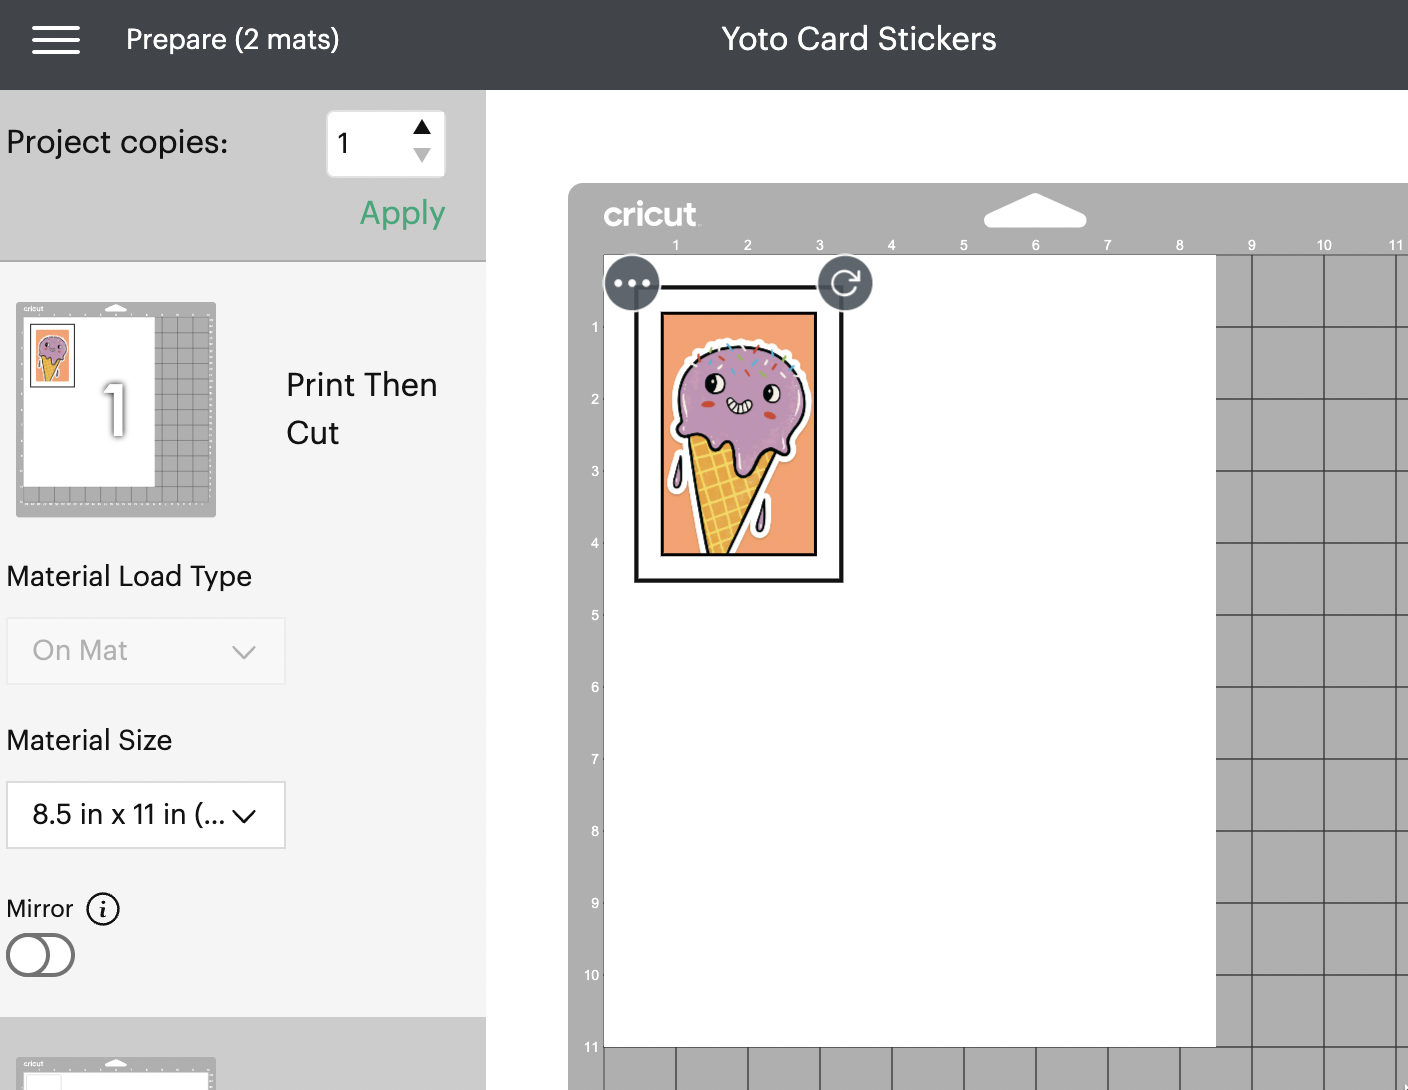
You can fit six stickers onto a page.
Step 5: Attach Stickers to Make Your Own (MYO) Yoto cards
Peel and attach to the Make your Own Yoto card.
I like to align the top edges of the sticker first before pressing down the entire sticker. Sometimes the sticker might be slightly off so starting from the top means that if there is any misalignment, it will only be visible on the bottom of the card.

Don’t forget to link the card using the Yoto app!
Take a look at my How to Make Your Own Yoto card tutorial if you need help adding Yoto icons, uploading audio and creating playlists, or linking the card.
I don’t have a Cricut, how do I make my own Yoto Stickers?
If you don’t have a Cricut but want to make your own stickers, you can also use Google Docs.
A very helpful person from the Yoto official Facebook group shared a Yoto card template on Google Docs that can fit 9 cards onto a sheet.
I’ve tweaked the file and instructions from the original template so you are able to print with the rounded corners template and cut that out accordingly.
Just arrange your images and print them on sticker paper or printable vinyl.
You can learn where to find these audio files over at my Ultimate List of Free Content for the Yoto Player post.
The other option is the HP Sprocket.
 Print Pictures on Zink Sticky-Backed Paper from your iOS & Android Device.")
This little gadget will print out an almost perfect-sized sticker for your card.
Just trim a tiny sliver around the card once you’ve peeled and placed the sticker and you’re good to go!
Hello! It looks like you can fit 9 on one page; however, when I try, it fits a max of 7. What is your max per page?
When using the Cricut, you can only fit 6-7 max per page. If you print it out on a regular sheet using the Canva template (and then cutting yourself after), you can fit 9. Hope this helps!