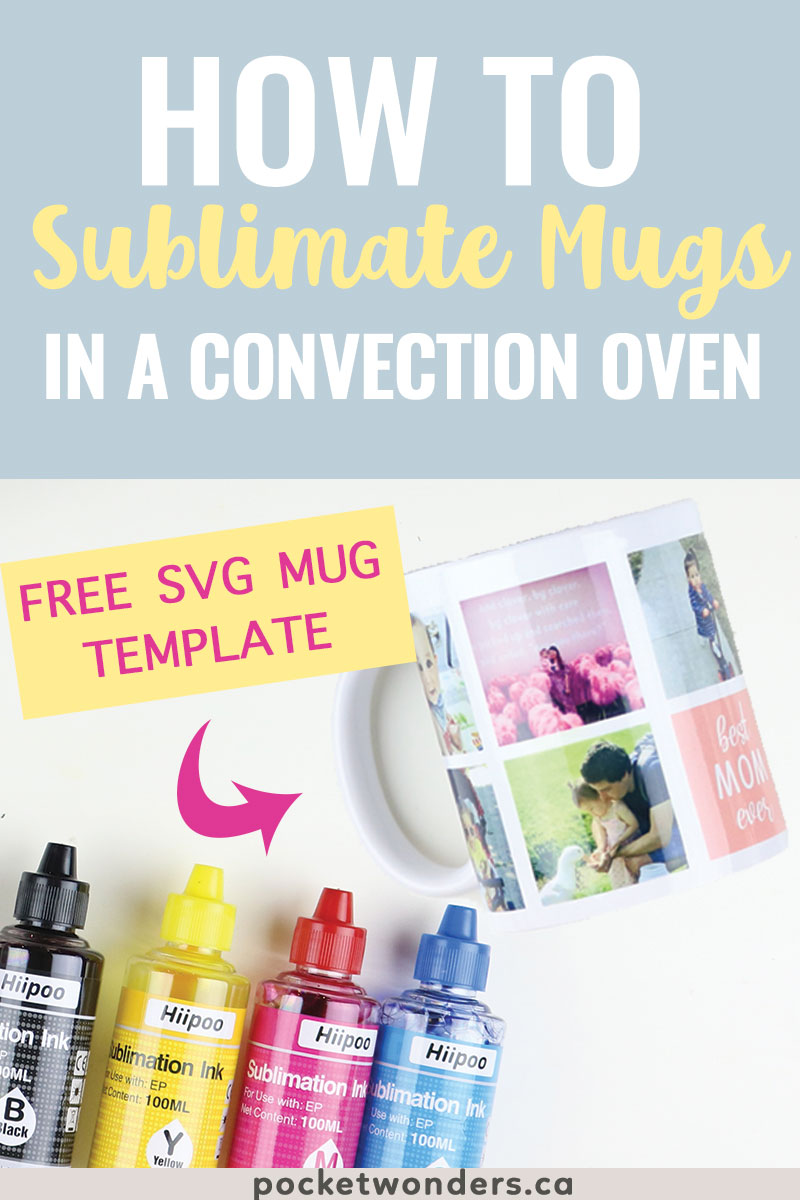
DIY Sublimation Mug in Convection Oven (Free SVG template)
Crafts using sublimation techniques create professional-looking gifts. Learn how to sublimate a mug using my free SVG mug template to create your own personalized gift.
This post is sponsored and contains some affiliate links for your convenience (which means if you make a purchase after clicking a link I will earn a small commission but it won’t cost you a penny more)! Read my full disclosure policy.
Materials Needed to Sublimate a Mug
- Sublimation Printer (Or you can convert a regular printer to a sublimation printer)
- Sublimation Ink (get a special discount using this link)
- Heat Gloves (recommended)
Get my free SVG mug design file (available in my free resource library – get the password by filling out the form on the sidebar or below).
Video Tutorial
If you'd rather watch a video on how to sublimate a mug in a convection oven instead (recommended!), you can check it out here:
How to Sublimate a Mug in a Convection Oven
STEP 1: Download the SVG template
Grab the free mug template SVG from the Free Resource Library.
You can sign up to get access through the form above or there is also a link to the resource library page.
STEP 2: Upload to Cricut Design Space
You can use any photo editing program you are comfortable with to edit the mug template.
Since most of my readers are vinyl cutting machine owners, I will be showing how to customize the mug template using Cricut Design Space since many people will be comfortable using it.
Upload the free mug SVG template into Cricut Design Space by going to "Upload".
Resize the template to your mug. If you are using the recommended mugs then resize the width to 9". If you are using a different size mug, make sure you measure your mug and resize the template to fit.
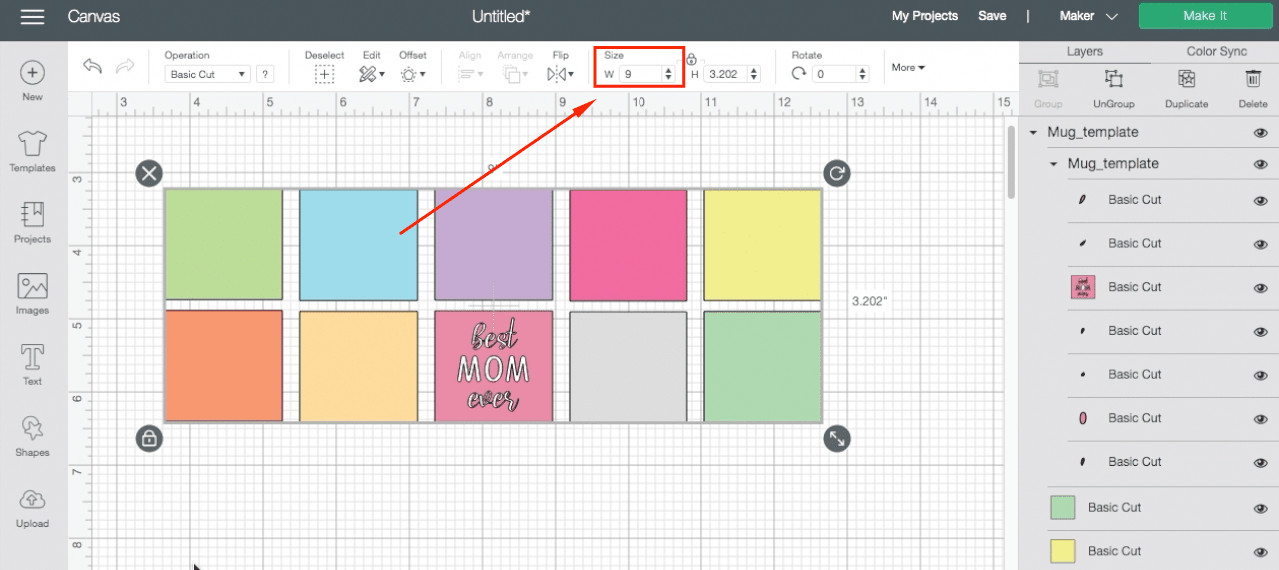
Upload the images you want to use on your photo grid.
Resize your images down so you can play with them on the template.
Each block is coloured so it is easier for you to see which pieces to move around and use.
Place your image below the coloured block you would like your image you be under.
Select the coloured block layer and go to Operations - Draw - Pen.
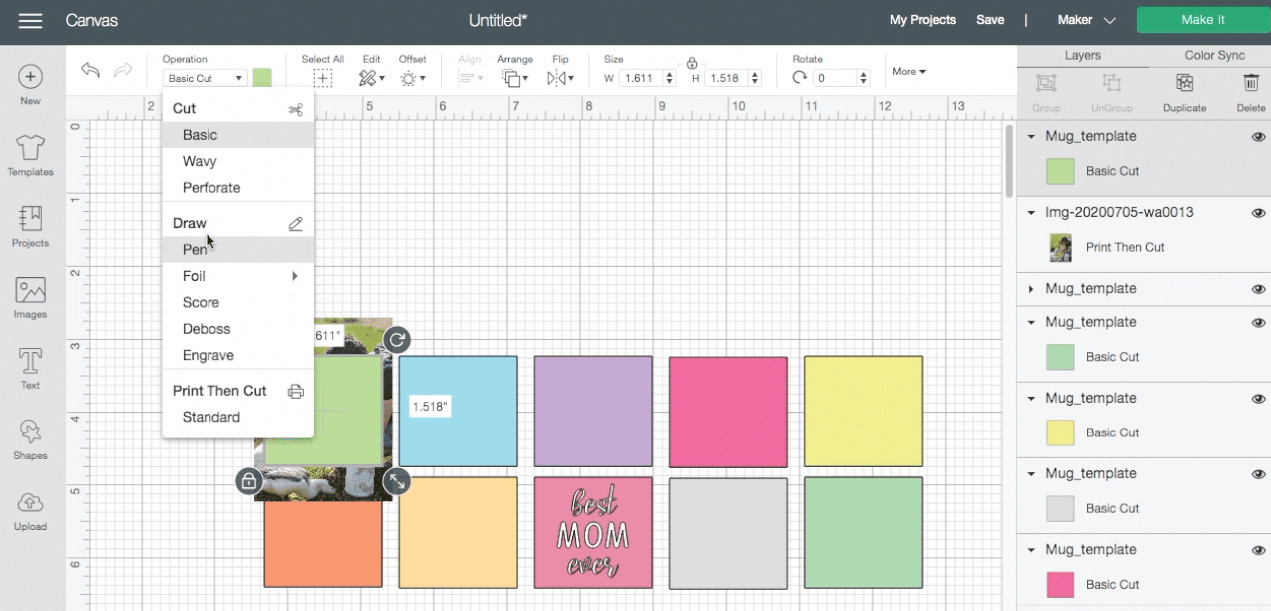
Then move your image around until you are happy with the placement and size.
Select the image layer and the coloured block together by holding Shift on your keyboard and then Slice the two layers.
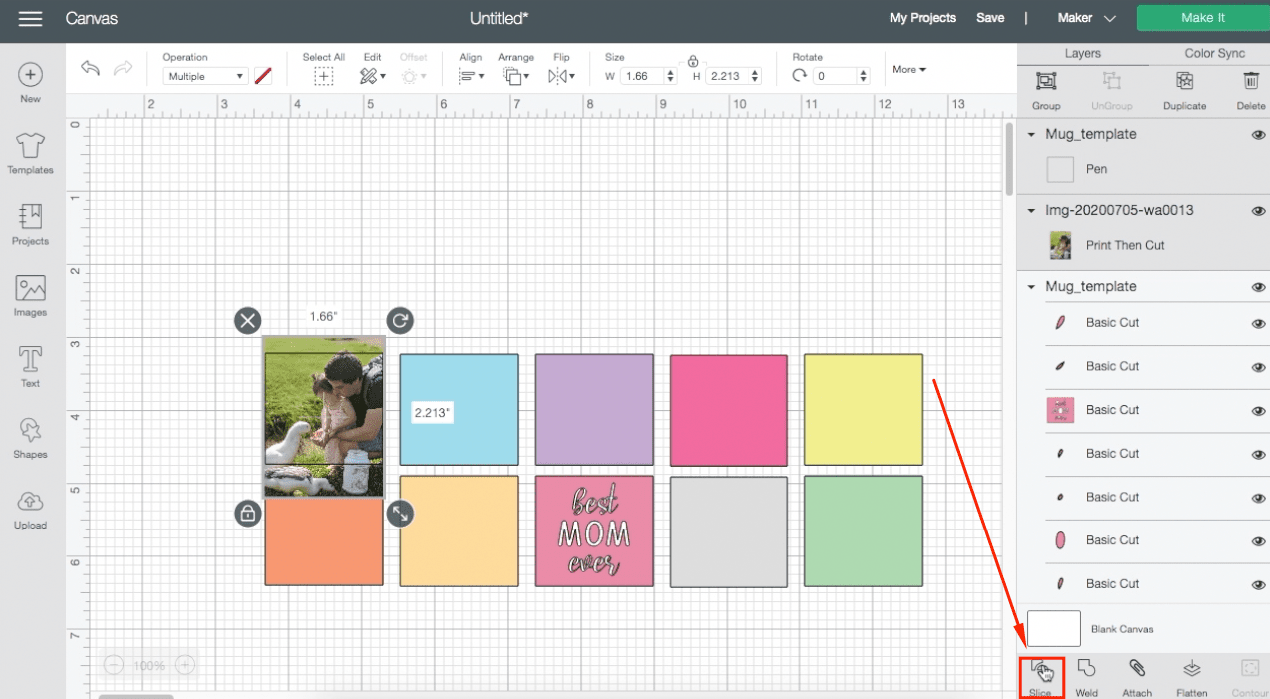
Delete the layers you aren't using (the excess image and the coloured block).
Repeat these steps until you have an image in every block.
Once you are happy with all of your images, select all of the layers and Flatten.

This should leave you with one layer with the layer type "Print, Cut".
We are going to be printing it but we are not using our Cricut to Cut it since it will be faster with scissors. (Though if you really want your Cricut to cut it, it will still cut it out.)
Click on Make It.
When you send it to the printer, make sure you mirror it and turn the bleed off.
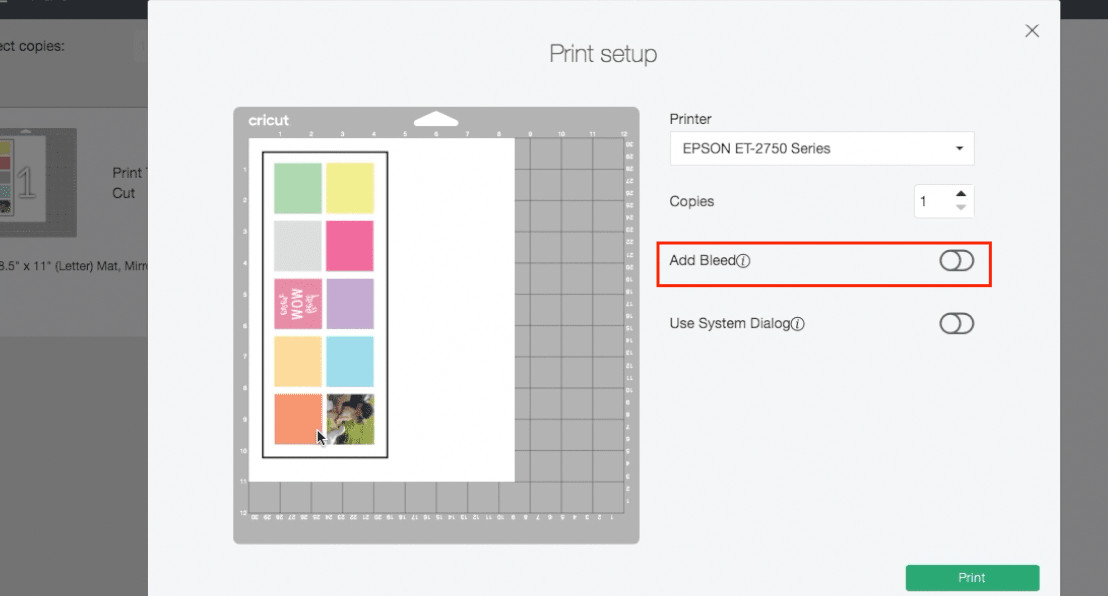
Send it to print on your sublimation printer.
Make sure you are using Sublimation paper.
Some sublimation papers have writing on the backside so you know which side to print on. Some do not so you will need to be careful you print on the right side of the paper.
STEP 3: Prepare your Sublimation Mug
With your printed image, trim around the black lines. Make sure that none of the black lines are left. Since they are printed with sublimation ink, they WILL transfer to your cup if you don't cut them off.
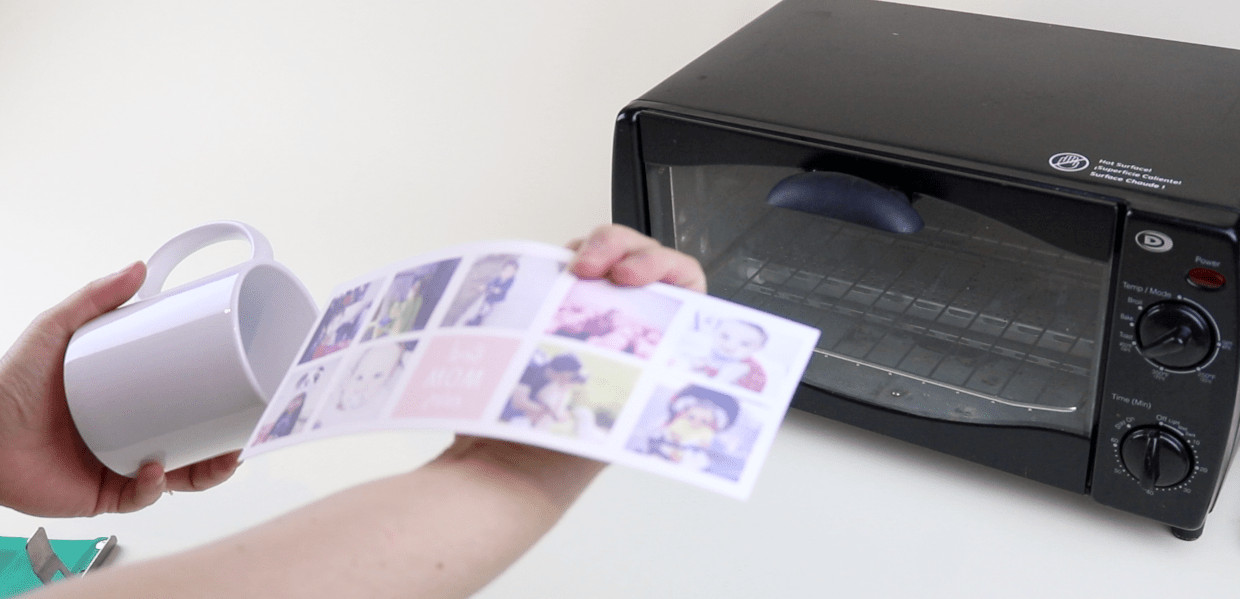
Double check that the image is MIRRORED.
Place the image on the cup and line it up so it's straight. If you cut along the black lines, this should be pretty easy to line up.
Sublimation is all about heat and pressure.
Tape your image to your cup using heat tape, making sure to tape it as firmly to the cup as possible. Don't be afraid to use extra tape around the edges.
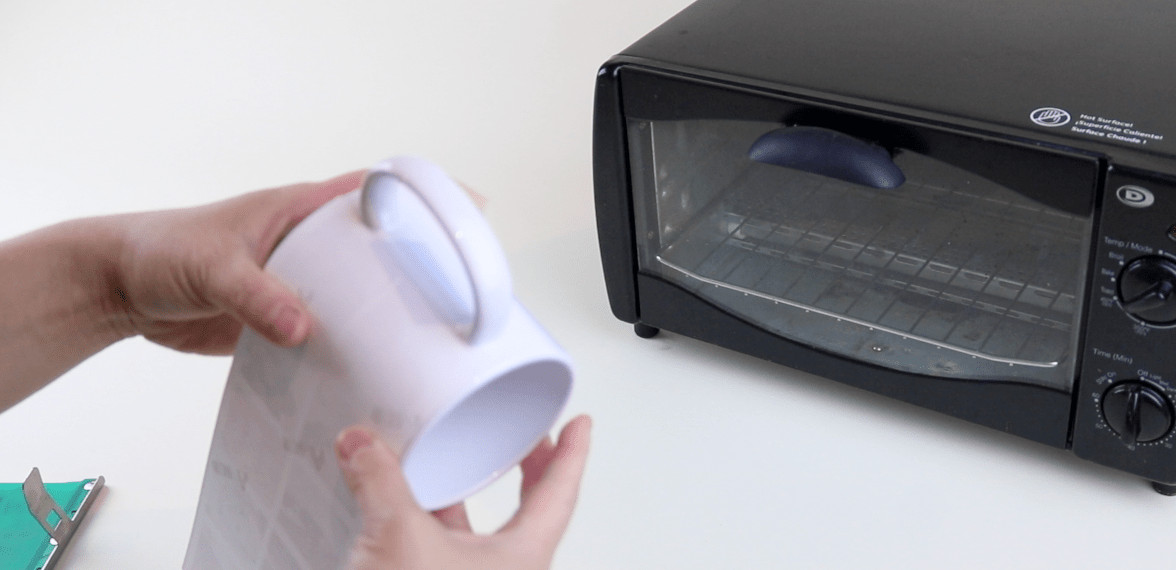
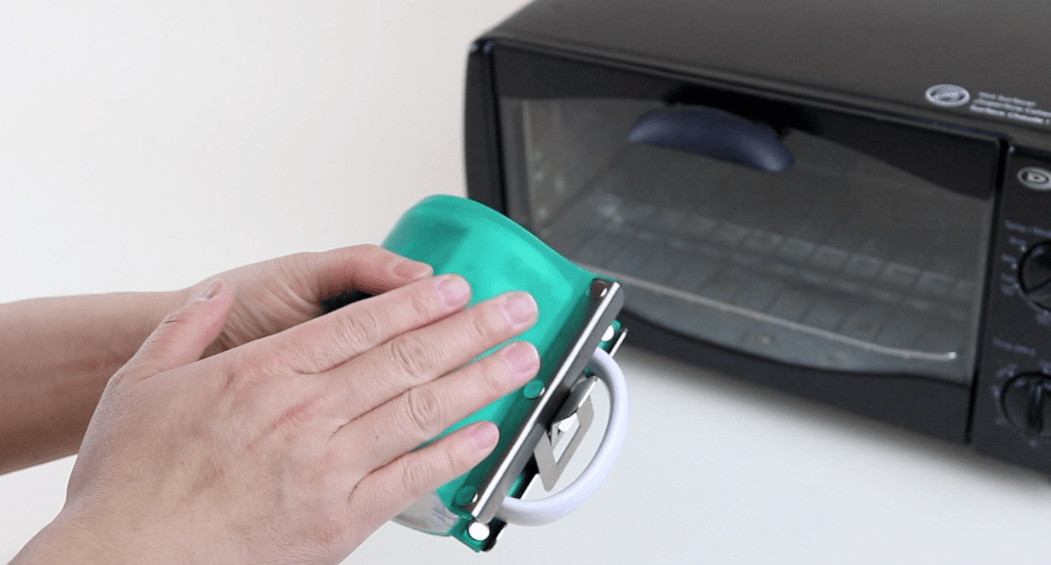
Next, put on a mug wrap.
I've chosen to use a mug wrap instead of shrink wrap because shrink wrap didn't apply firm pressure close to the handle of the mug. This caused uneven image transfer.
The mug wrap will apply even pressure around the mug. It may require a little patience and some pressure to close the clasp.
STEP 4: Sublimate it in the Convection Oven
Now we can place our mug in our convection oven.
Any convection oven will do just fine but you may want to get a taller one to fit larger items.
Note that once you use the oven for crafts, you SHOULD NOT USE IT FOR FOOD.
Any fumes from using it for crafts can be toxic if you use food in the oven after.
It might also take a few tries to get the right temperature and time settings for your oven.
Be careful NOT TO BURN your mug by placing it in too long. In one of my trials, I put it in for 12 minutes which was WAY TOO LONG and caused permanent burn marks on my mug.
The magic settings for me were 6 minutes total (flip after 3 mins) at 400 degrees Fahrenheit.
STEP 5: Let it cool
Safety first. Please use heat gloves when you are turning your mug and when you remove it to cool.
I used a regular cooling rack (for baking) to let the mug cool.
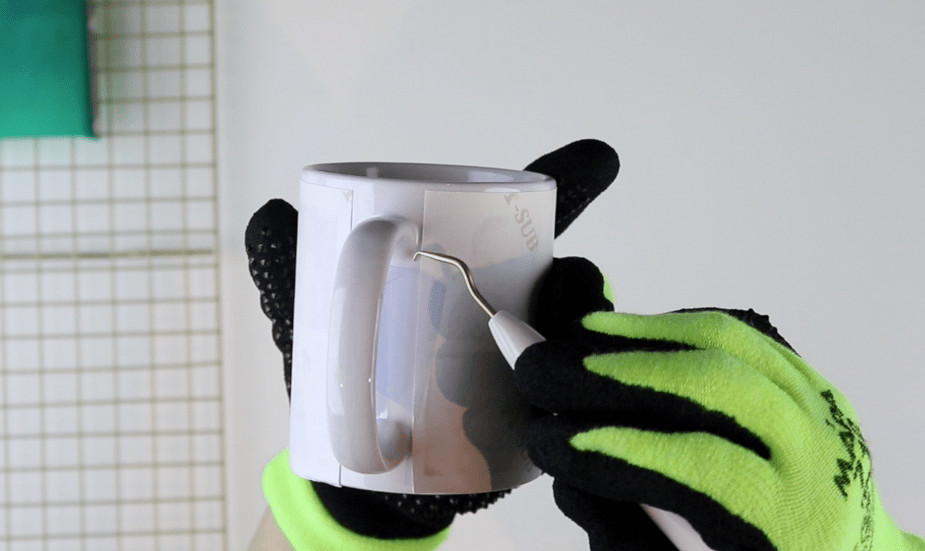
Remove the tape and the sublimation paper. You can use a weeding tool to help remove the tape.
That's it!
The mug is dishwasher safe and microwave safe.
I hope you like this tutorial and mug template. Let me know in the comments what you'd like to see next.
Frequently Asked Questions
Do I need a sublimation printer to make this?
Yes. In order to sublimate mugs, images need to be printed using sublimation ink.
Can I use any mug to make this?
No.
Mugs from the Dollar store will not work with sublimation because sublimation requires a special coating to work. You need sublimation blanks to create sublimation projects.
Can I sublimate a mug using shrink wrap?
Yes! I tried this project using shrink wrap at first but I didn't get very good image transfer along the handle of the mug. I preferred to use my mug wrap because it gave even pressure all around the mug.
Can I use a Cricut Mug Press?
Yes. If you prefer to use a mug press (Cricut or otherwise), you can definitely do so. I've chosen to use my oven instead because I'm not limited to making only mugs. You can read why I don't recommend the Cricut Mug press here.
Crafting Community
If you like this tutorial, join our Facebook community where I post other free SVG files and resources! I look forward to crafting with you!