
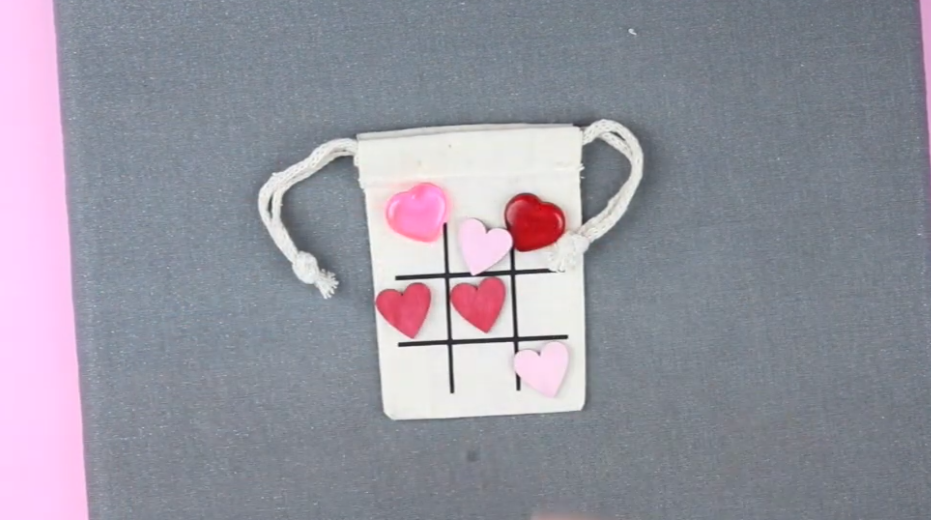
Personalized Cricut Tic-Tac-Toe Loot Bags
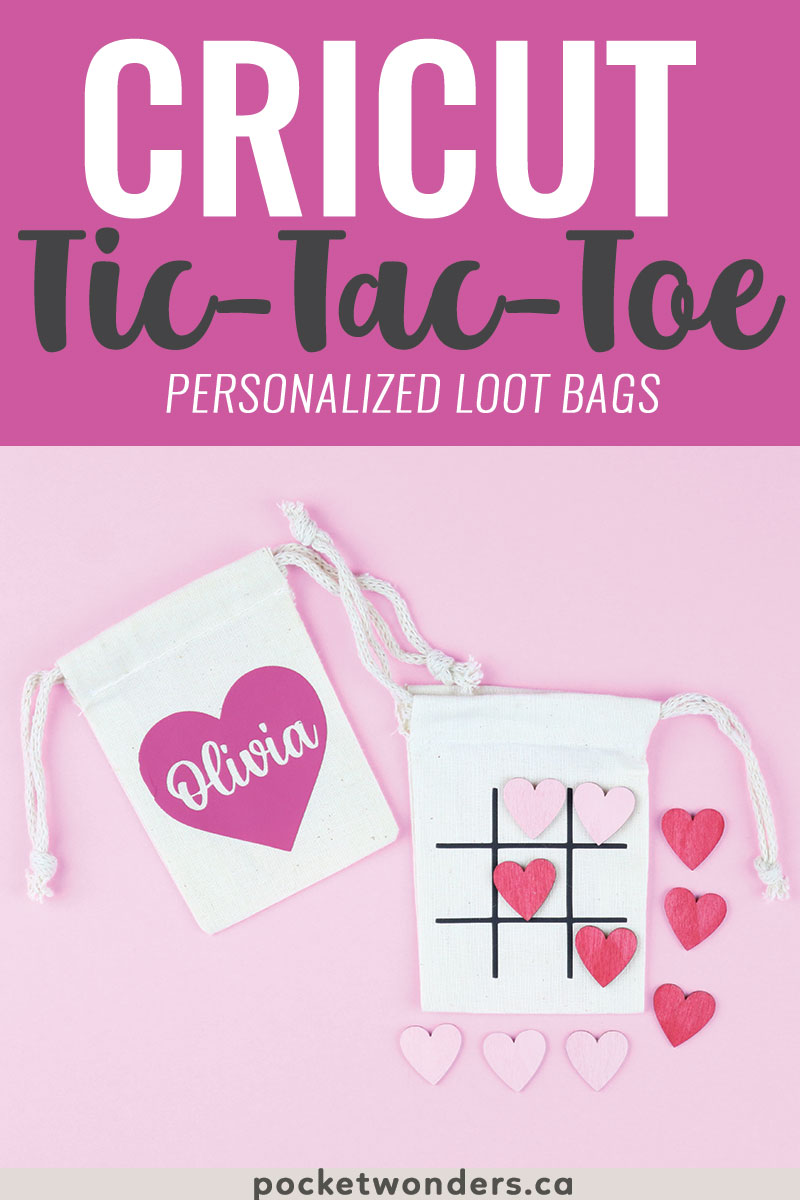
Make your own personalized tic tac toe loot bags on your Cricut. These would be perfect for gifts on Valentine’s Day or for birthday parties.
Grab the free files from the resource library to get started!
If you like this tutorial, join our Facebook community where I post other free SVG files and resources! I look forward to crafting with you!

This post contains some affiliate links for your convenience (which means if you make a purchase after clicking a link I will earn a small commission but it won’t cost you a penny more)! Read my full disclosure policy.
MATERIALS TO MAKE THE VALENTINES
- Standard Grip Mat (the 12″x 12″ size)
- Cricut Easy press or Iron
Get other free SVG design files (available in my free resource library – get the password by filling out the form on the sidebar or below).
HOW TO MAKE THE TIC TAC TOE LOOT BAGS
If you’d rather watch a video on how to make it step by step, take a look at this video here (highly recommended!):
STEP 1: UPLOAD FILES
Upload the free SVG file into Cricut Design Space.
You will need to unzip the files before uploading them into Cricut Design Space. Make sure you are using the .SVG file.
STEP 2: DESIGN
Ungroup the layers once.
The design is set to fit the 3″x4″ bags. You will need to adjust the size of the designs to fit your bag if you are using a different size.
Included in the file are a heart that you can personalize as well as the tic-tac-toe grid.
First, let’s ungroup our layers.
Let’s start by personalizing our design.
Select the text tool.
Type the name you’d like to personalize on the bag.
Change the font type. I am using Hello Valentica. It is free for personal use. If you are making these to sell, you will need a commercial licence.
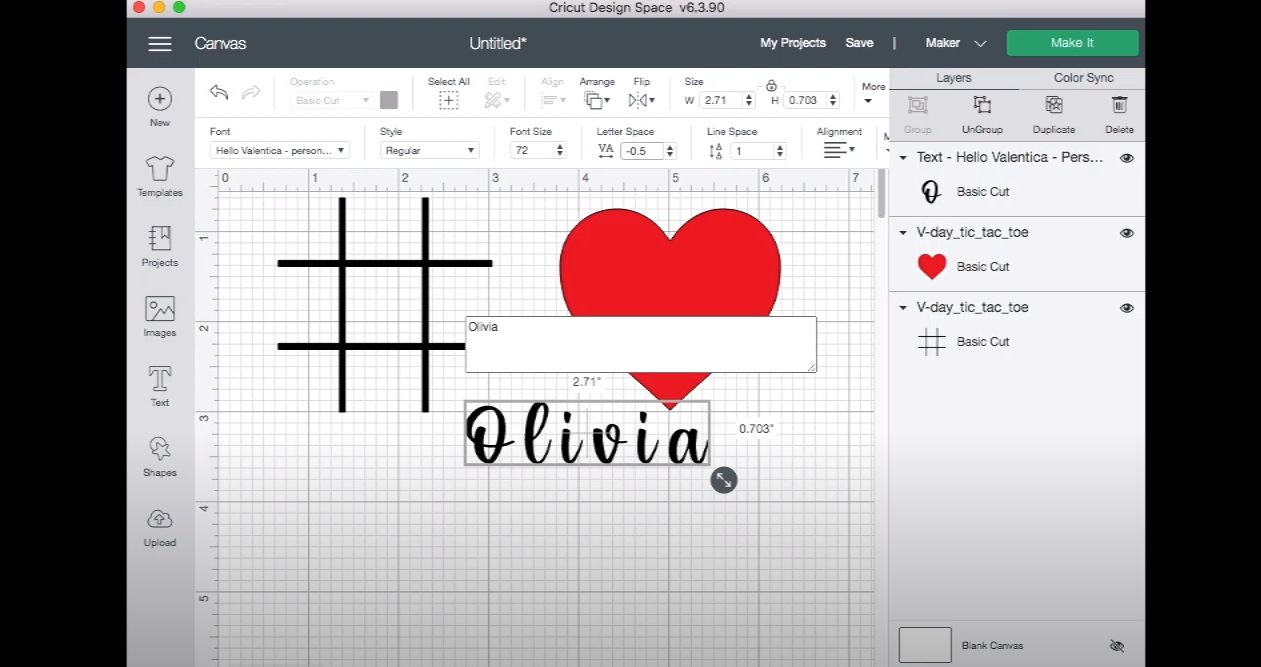
Adjust the letter-spacing. I always like to start with -0.5 and make adjustments from there.
Normally, we would continue to weld the letters together but it won’t be necessary for this project since it will all be cut out anyways.
Resize the name on top the of heart.
Select both layers and then Slice them.

Delete the extra layers so that only the cut-out heart remains.
STEP 3: CUT IT OUT
Follow the instructions on your machine to cut out the designs. Remember to mirror the layers and to put your vinyl shiny side down on the mat. There should be a reminder in Cricut design space when you select your material setting.
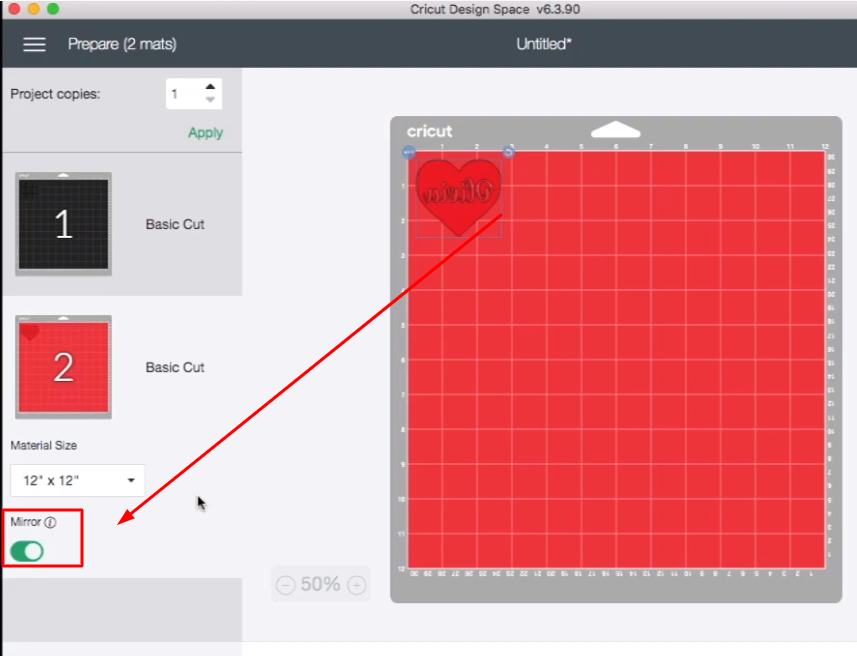
Follow the prompts to cut it out on your Cricut.
Weed out the areas that aren’t being used on the designs.
STEP 4: ASSEMBLE
Iron your vinyl on to the muslin bags using your Cricut Easy Press or a heat press.
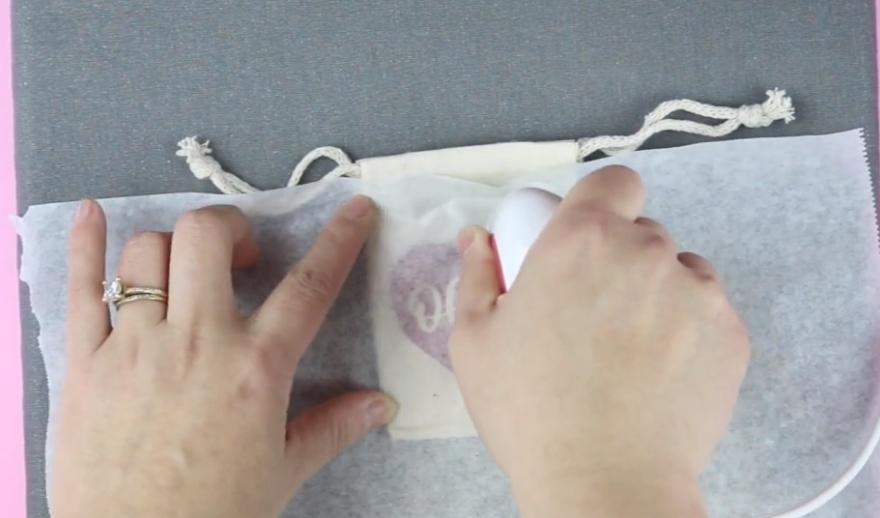
You can look up the settings for the Cricut heat press or you can start with a low setting and increase the heat as needed.
Remember to use a heat mat or a towel to prevent damage to whatever is underneath the bag.
I also like to use an extra sheet of parchment paper for additional protection.
You can use acrylic hearts, buttons, painted wood craft bits for the tic-tac-toe game pieces. I personally like painted wood craft bits.
CONGRATULATIONS
Doesn’t it look great?

Head over to our Facebook community to show off your bags!