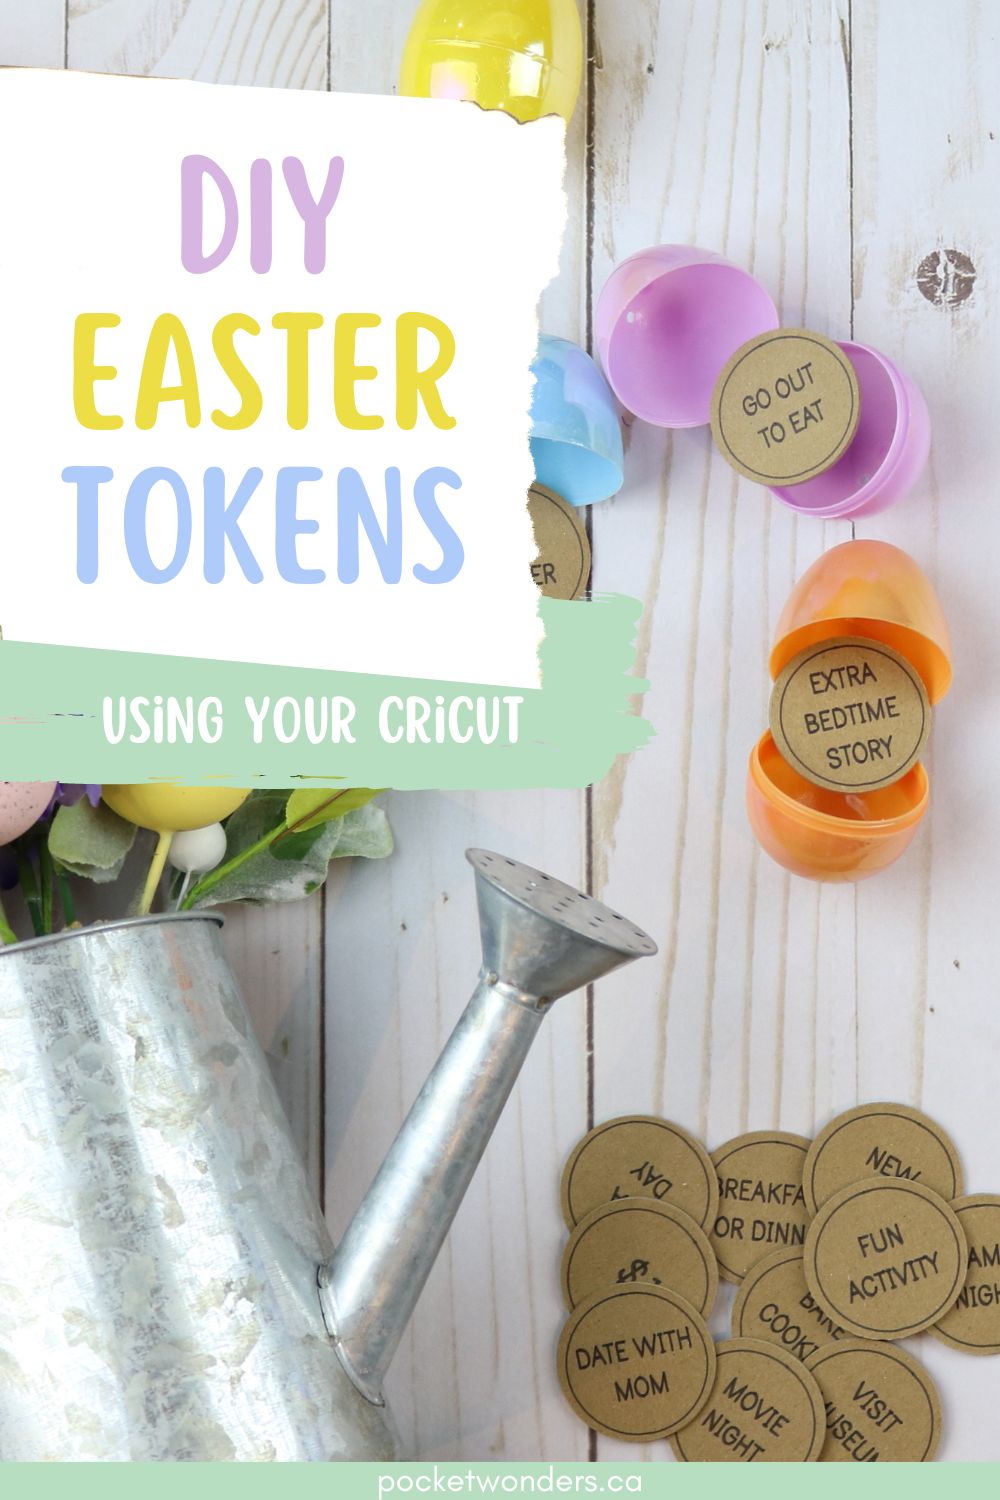
DIY Easter Tokens with a Cricut machine
Easter tokens are perfect non-candy easter egg fillers! Learn how you can make your own using a Cricut machine.
This post contains some affiliate links for your convenience (which means if you make a purchase after clicking a link I will earn a small commission but it won’t cost you a penny more)! Read my full disclosure policy.
What are Easter Tokens?
Normally inside plastic easter eggs, you might find stickers, candy, small toys, or even coupons for special treats or privileges.
For our Easter egg hunt this year, we’re doing something special – instead of candy, we’re using Easter tokens!
Easter tokens fit perfectly into standard plastic eggs and are redeemable to the parent or adult guardians.
It’s a fun twist that adds excitement to the hunt while keeping things healthy and diverse. Plus, it’s a great way to encourage positive interactions among the kids and their families.
Materials Needed to Make DIY Easter Tokens
- Cricut machine
- Cricut Tools
- Strong Grip Mat (the 12″x 12″ size)
- Cricut Fine Point Blade (Explore machines with Cardstock), Cricut Knife Blade (Maker machines with chipboard)
- Chipboard (Maker machines)
- Cardstock (Explore machines), Chipboard (Maker machines)
- Painter’s Tape
- Cricut 0.4 marker in black
- Easter Eggs
Get free SVG design files (available in my free resource library – get the password by filling out the form on the sidebar or below).
Easter tokens are a fantastic and enjoyable alternative to filling those plastic eggs with candy!
We are always looking for non-chocolate alternatives and thought Easter tokens were perfect to place in our eggs for Easter egg hunts since we can customize them to our family’s interests and can be made again and again with our Cricut.
Video Tutorial
Watch me make these step-by-step in this YouTube video below!
How to Make Easter Tokens with a Cricut
STEP 1: Create token designs in Cricut Design Space
Open up Cricut Design Space.
Select the Shapes panel on the left.
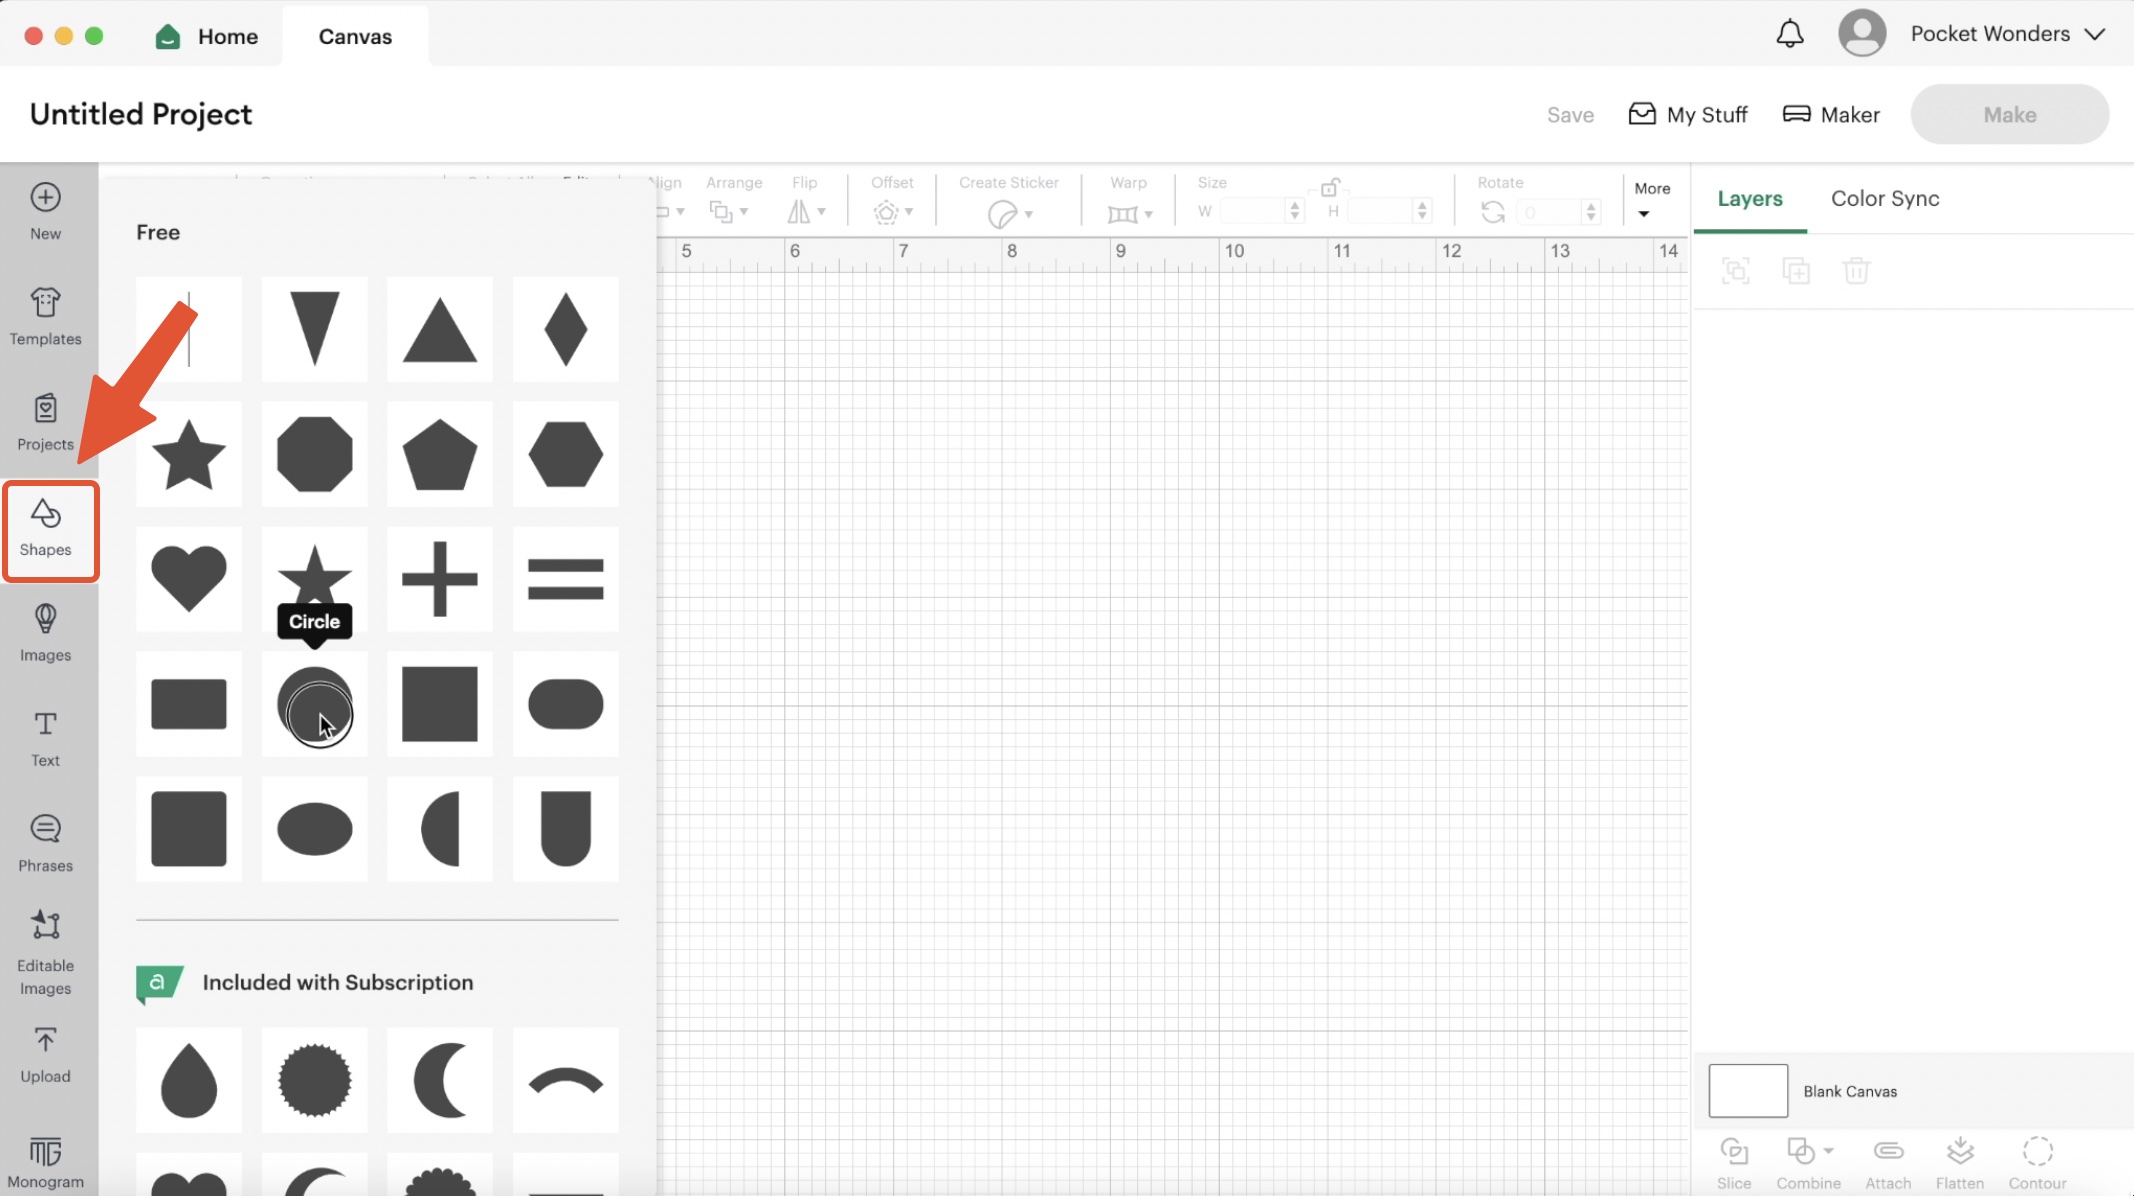
Select “Circle“.
Draw a circle (doesn’t really matter what size, we will resize it later).
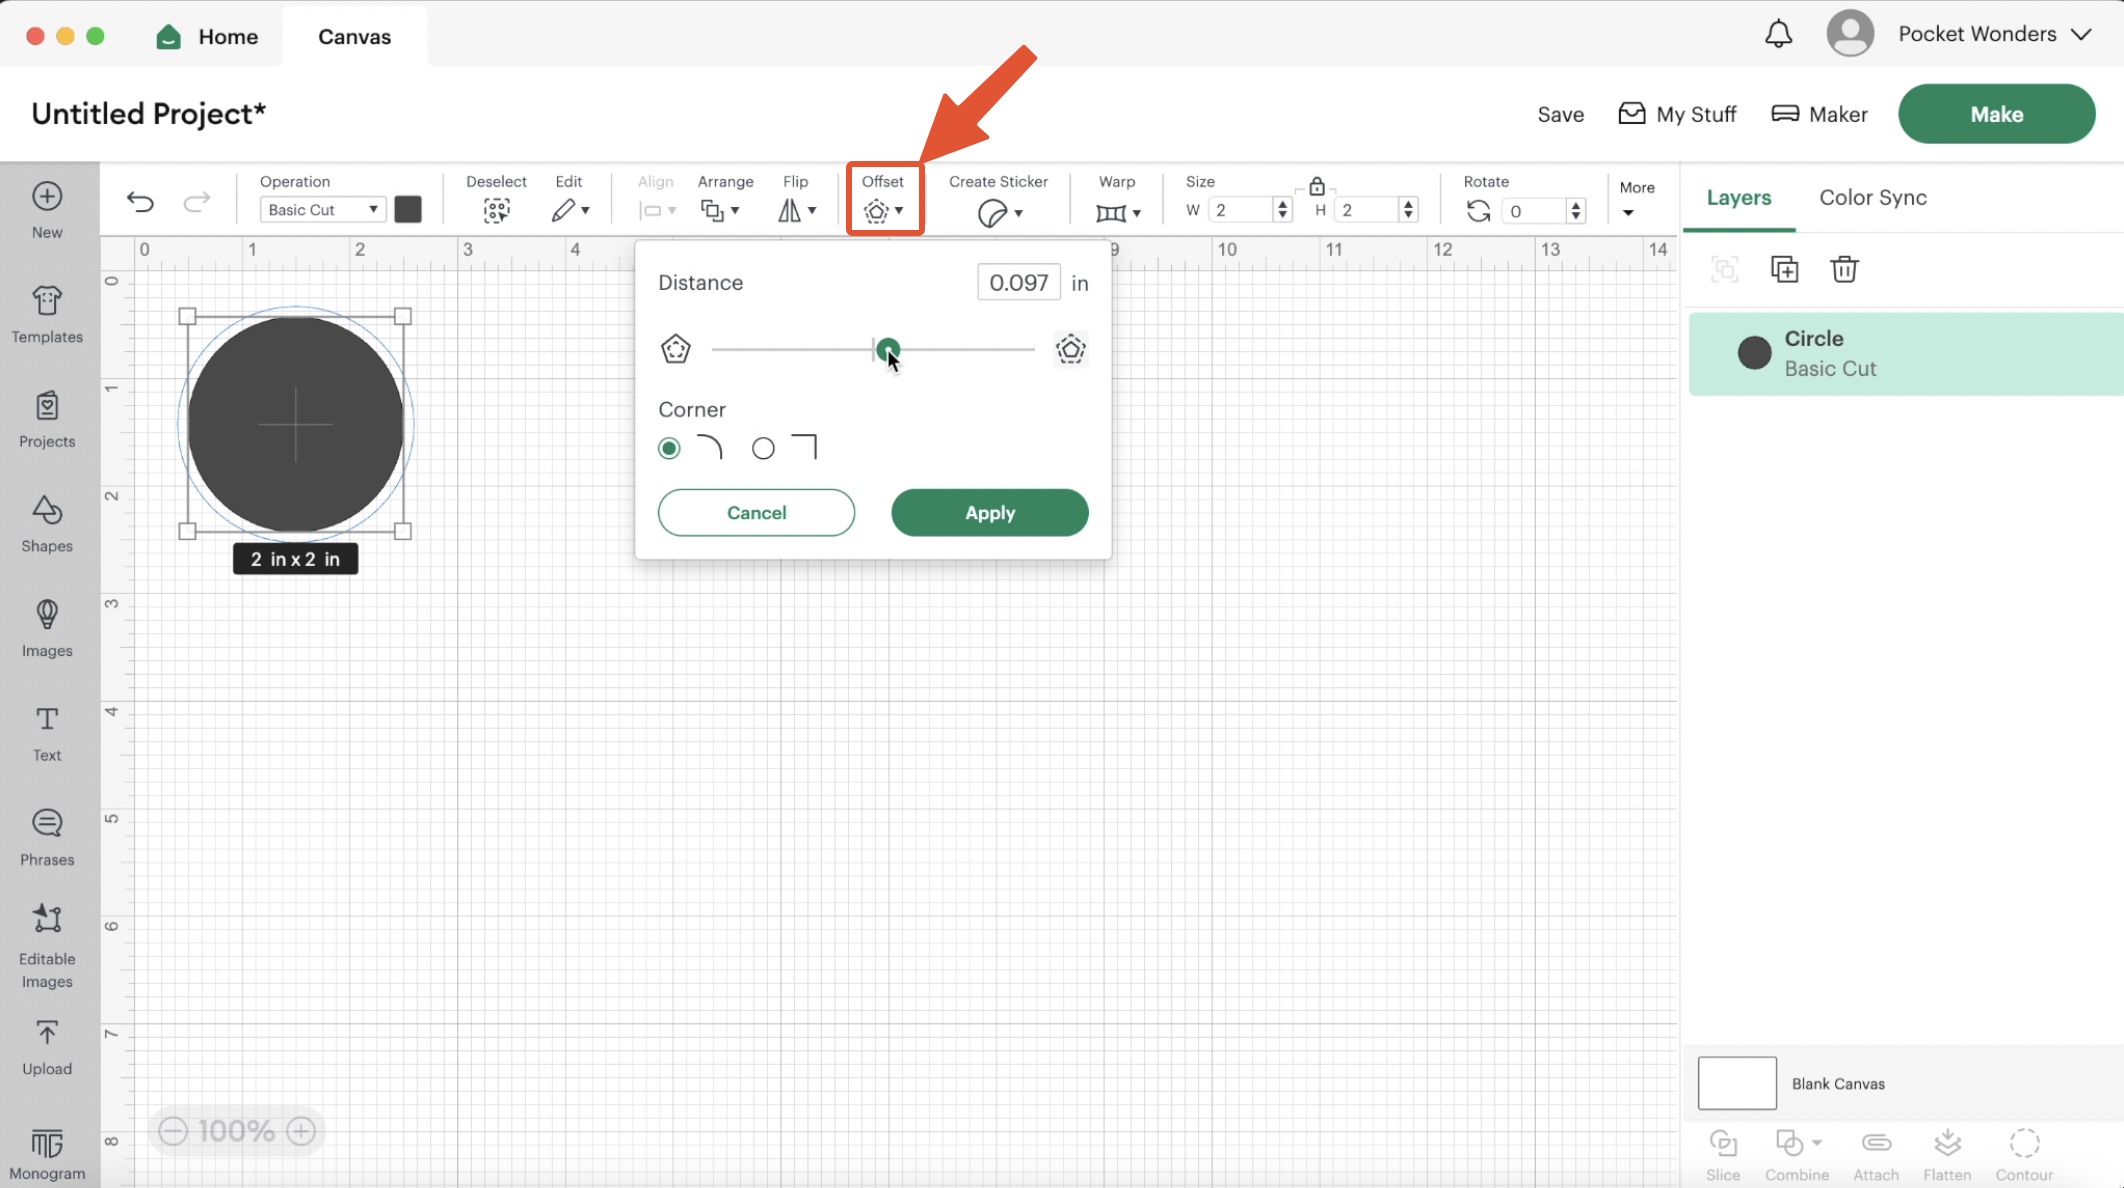
Go to the offset panel and add an offset to create an “outer circle”.
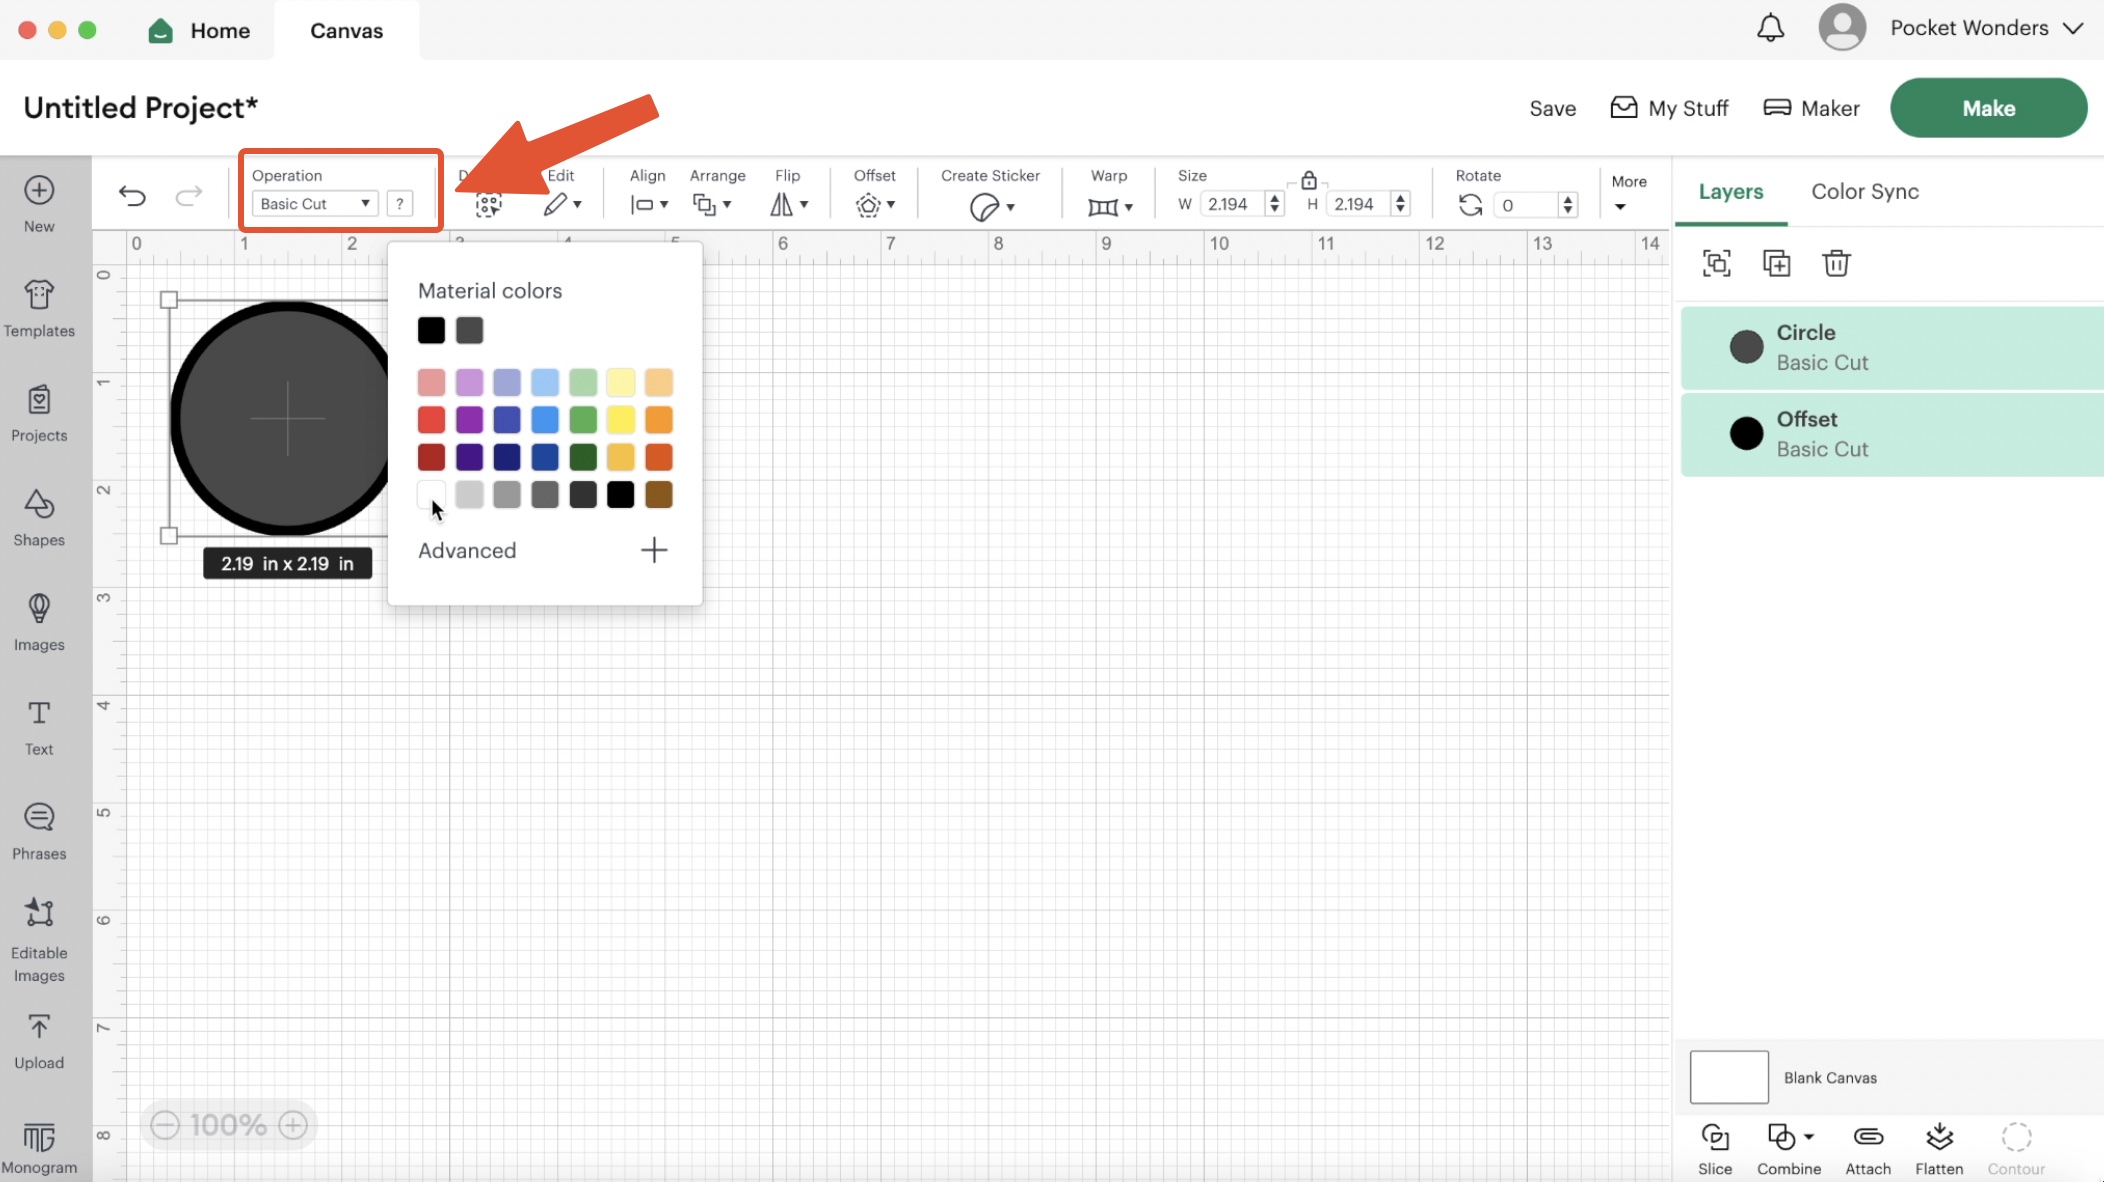
Select the layers and go to the Operation panel and change the colour to white to make it easier to see the text when we add it.
Add text. I used the font called Print Clearly.
Resize the text layer so it fits inside the circles.
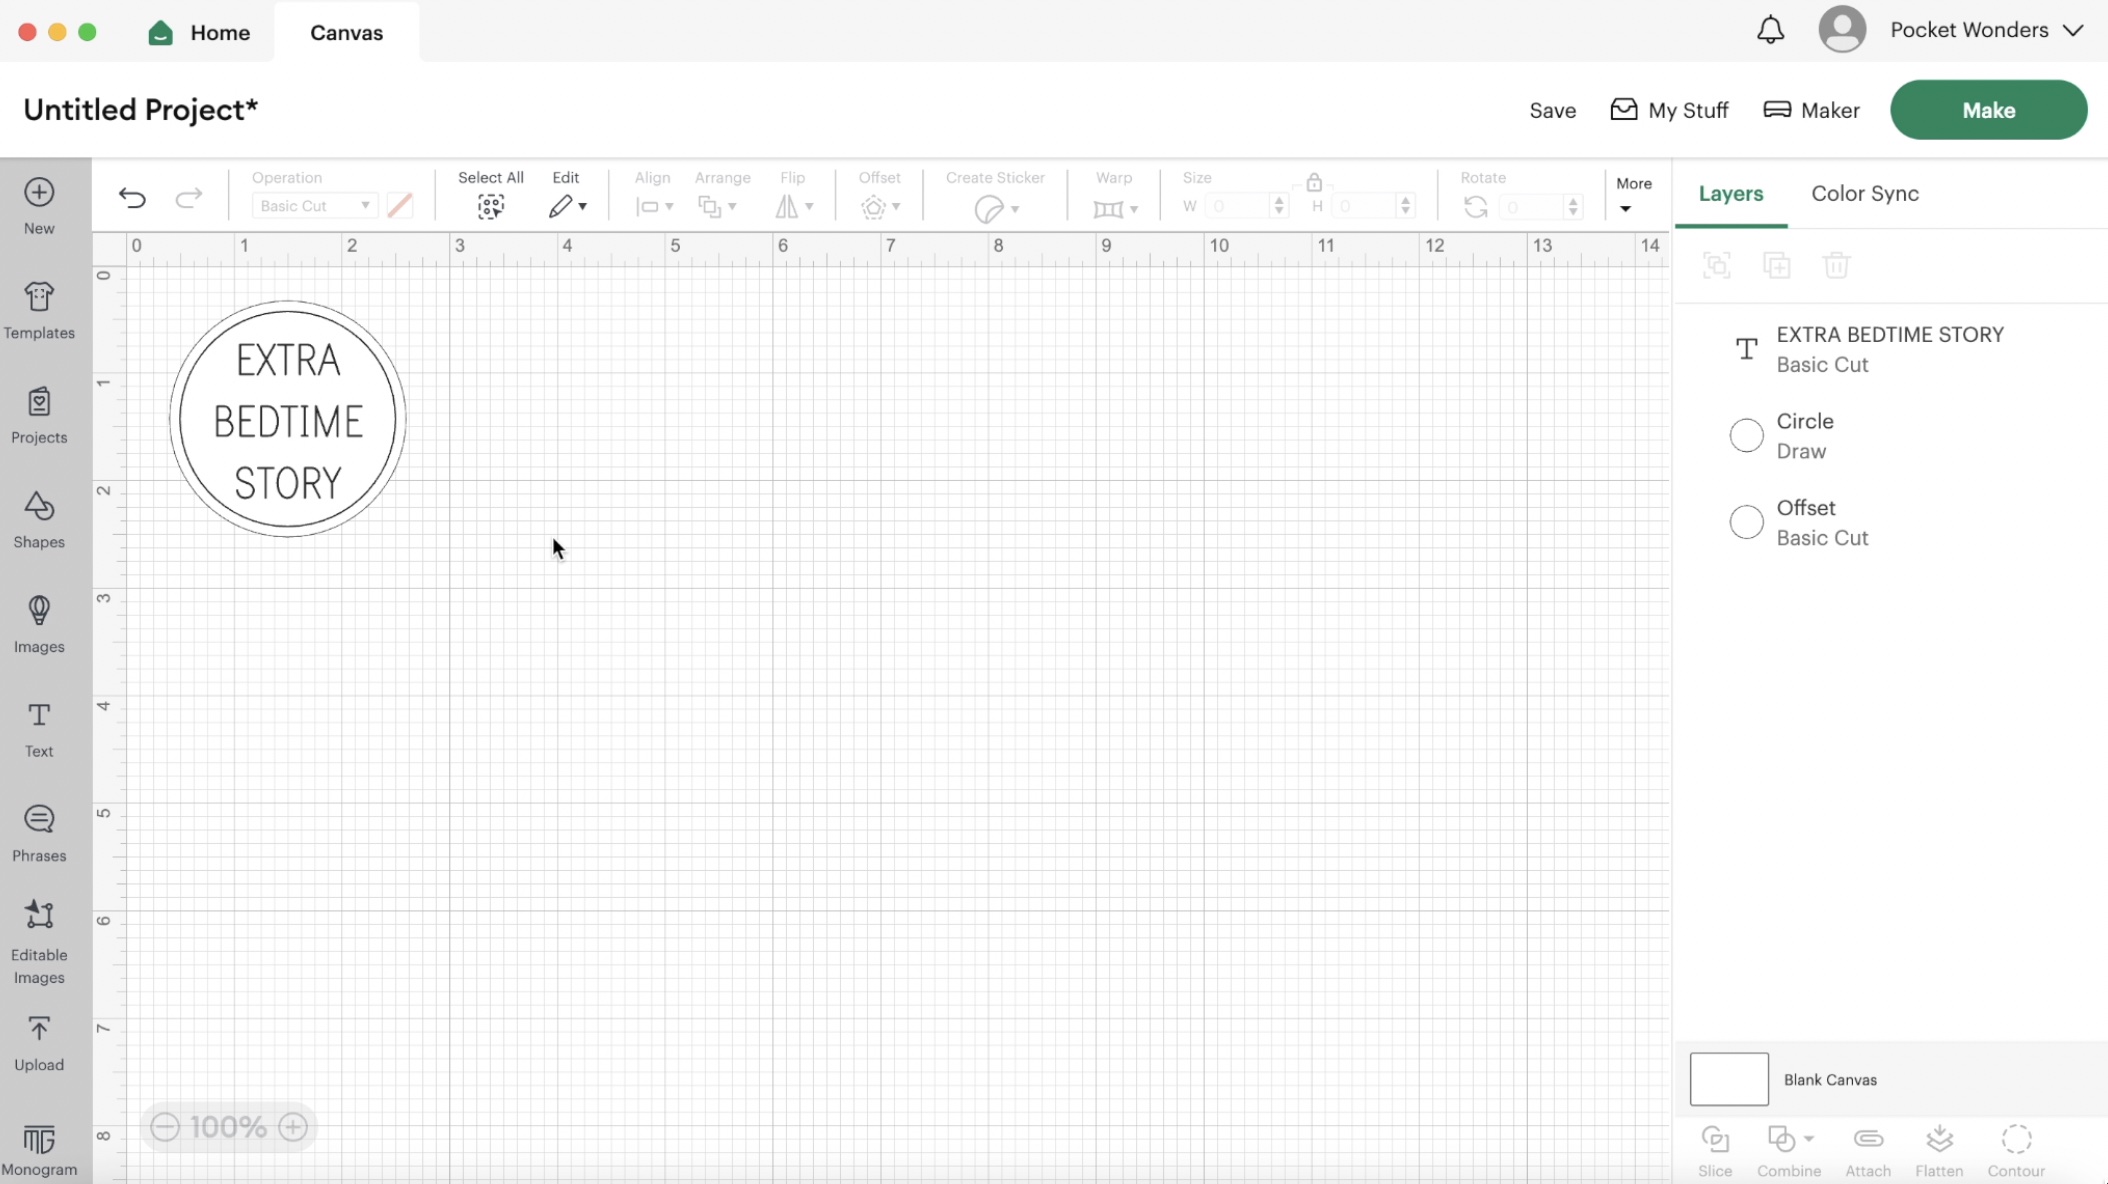
Align the text by selecting both Align > Center Horizontally and Align > Center Vertically.
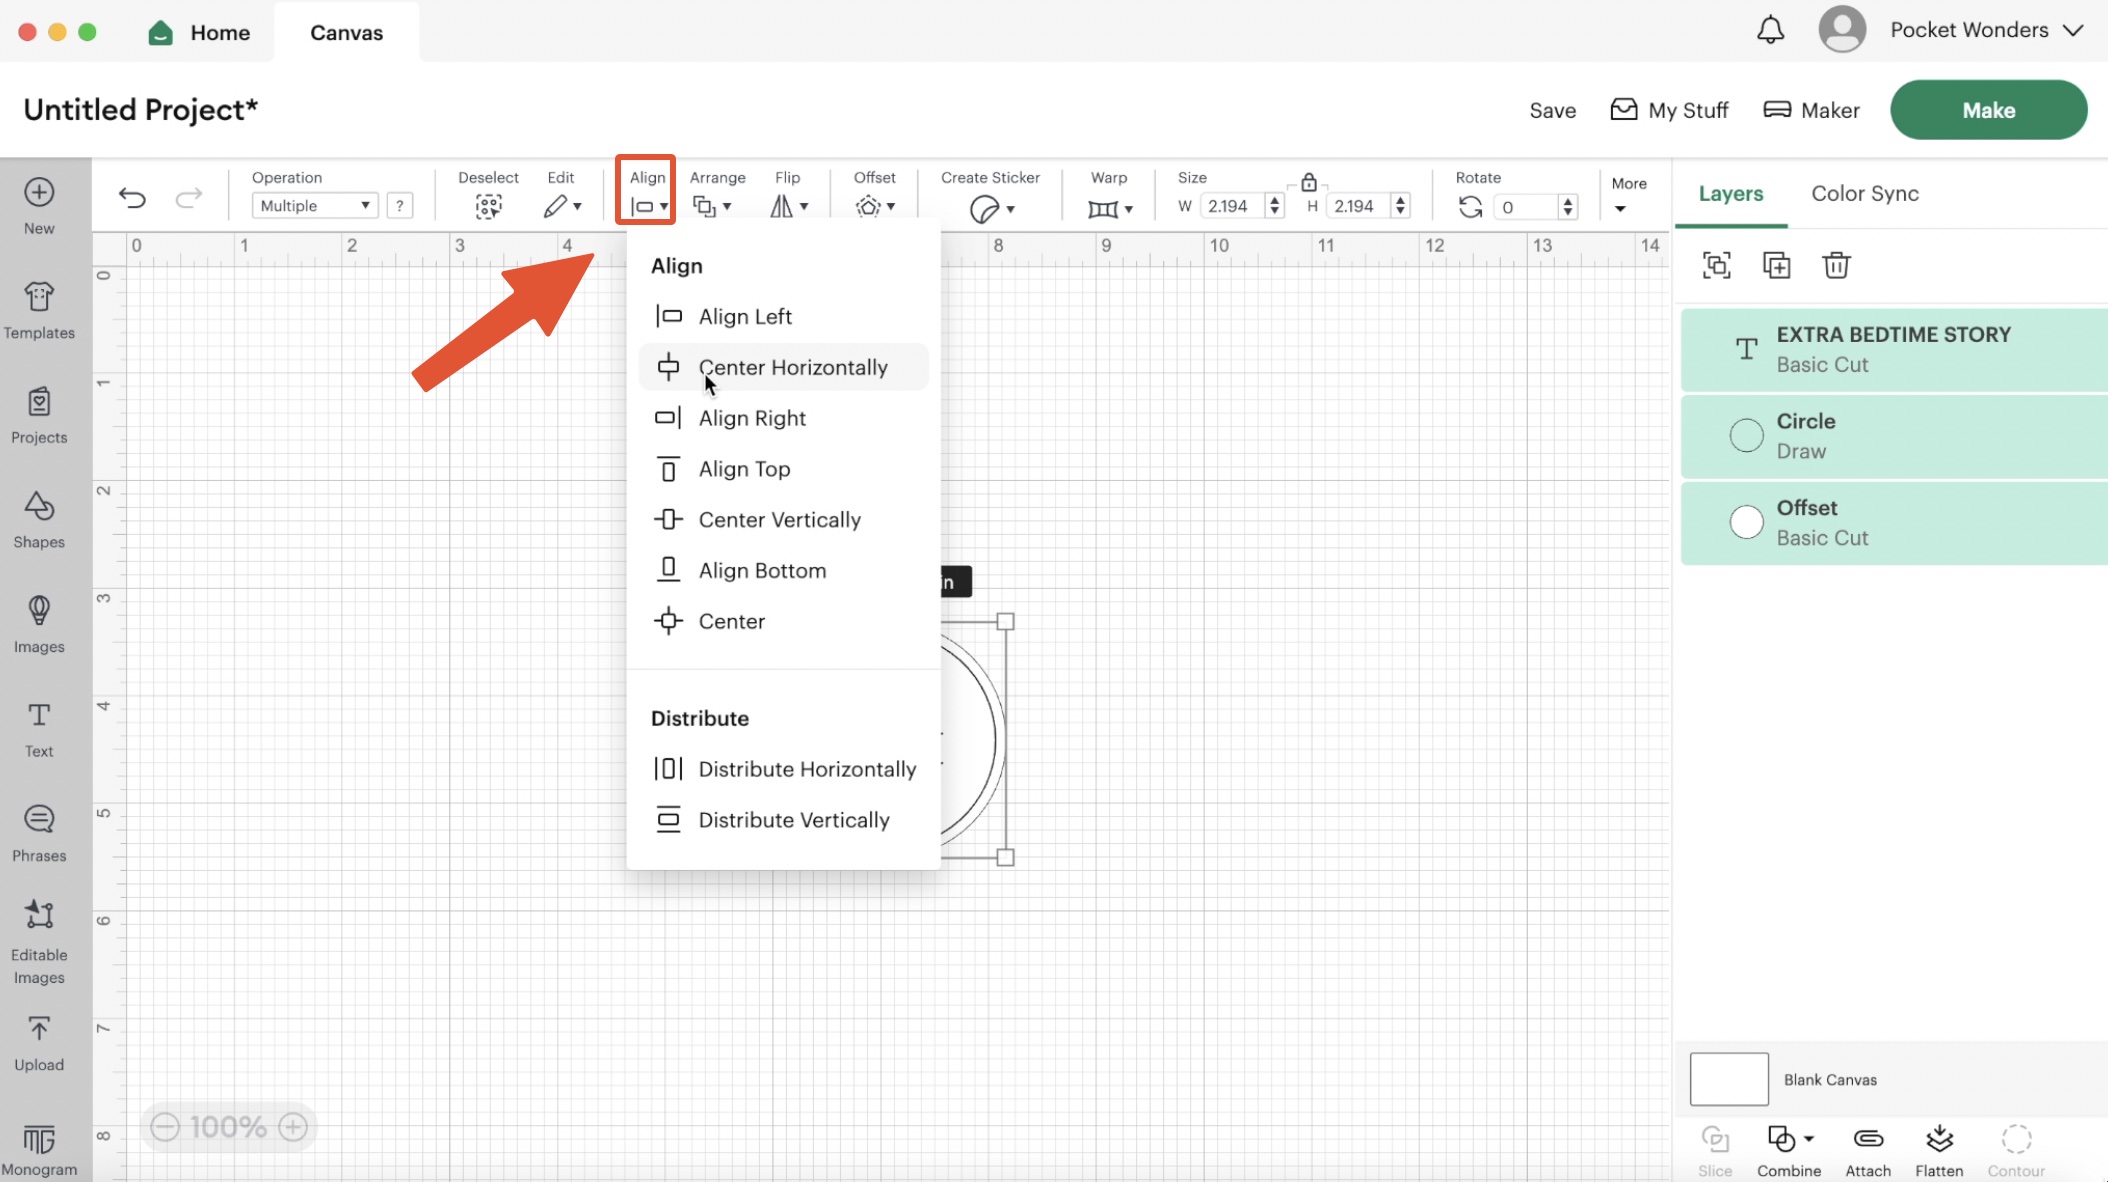
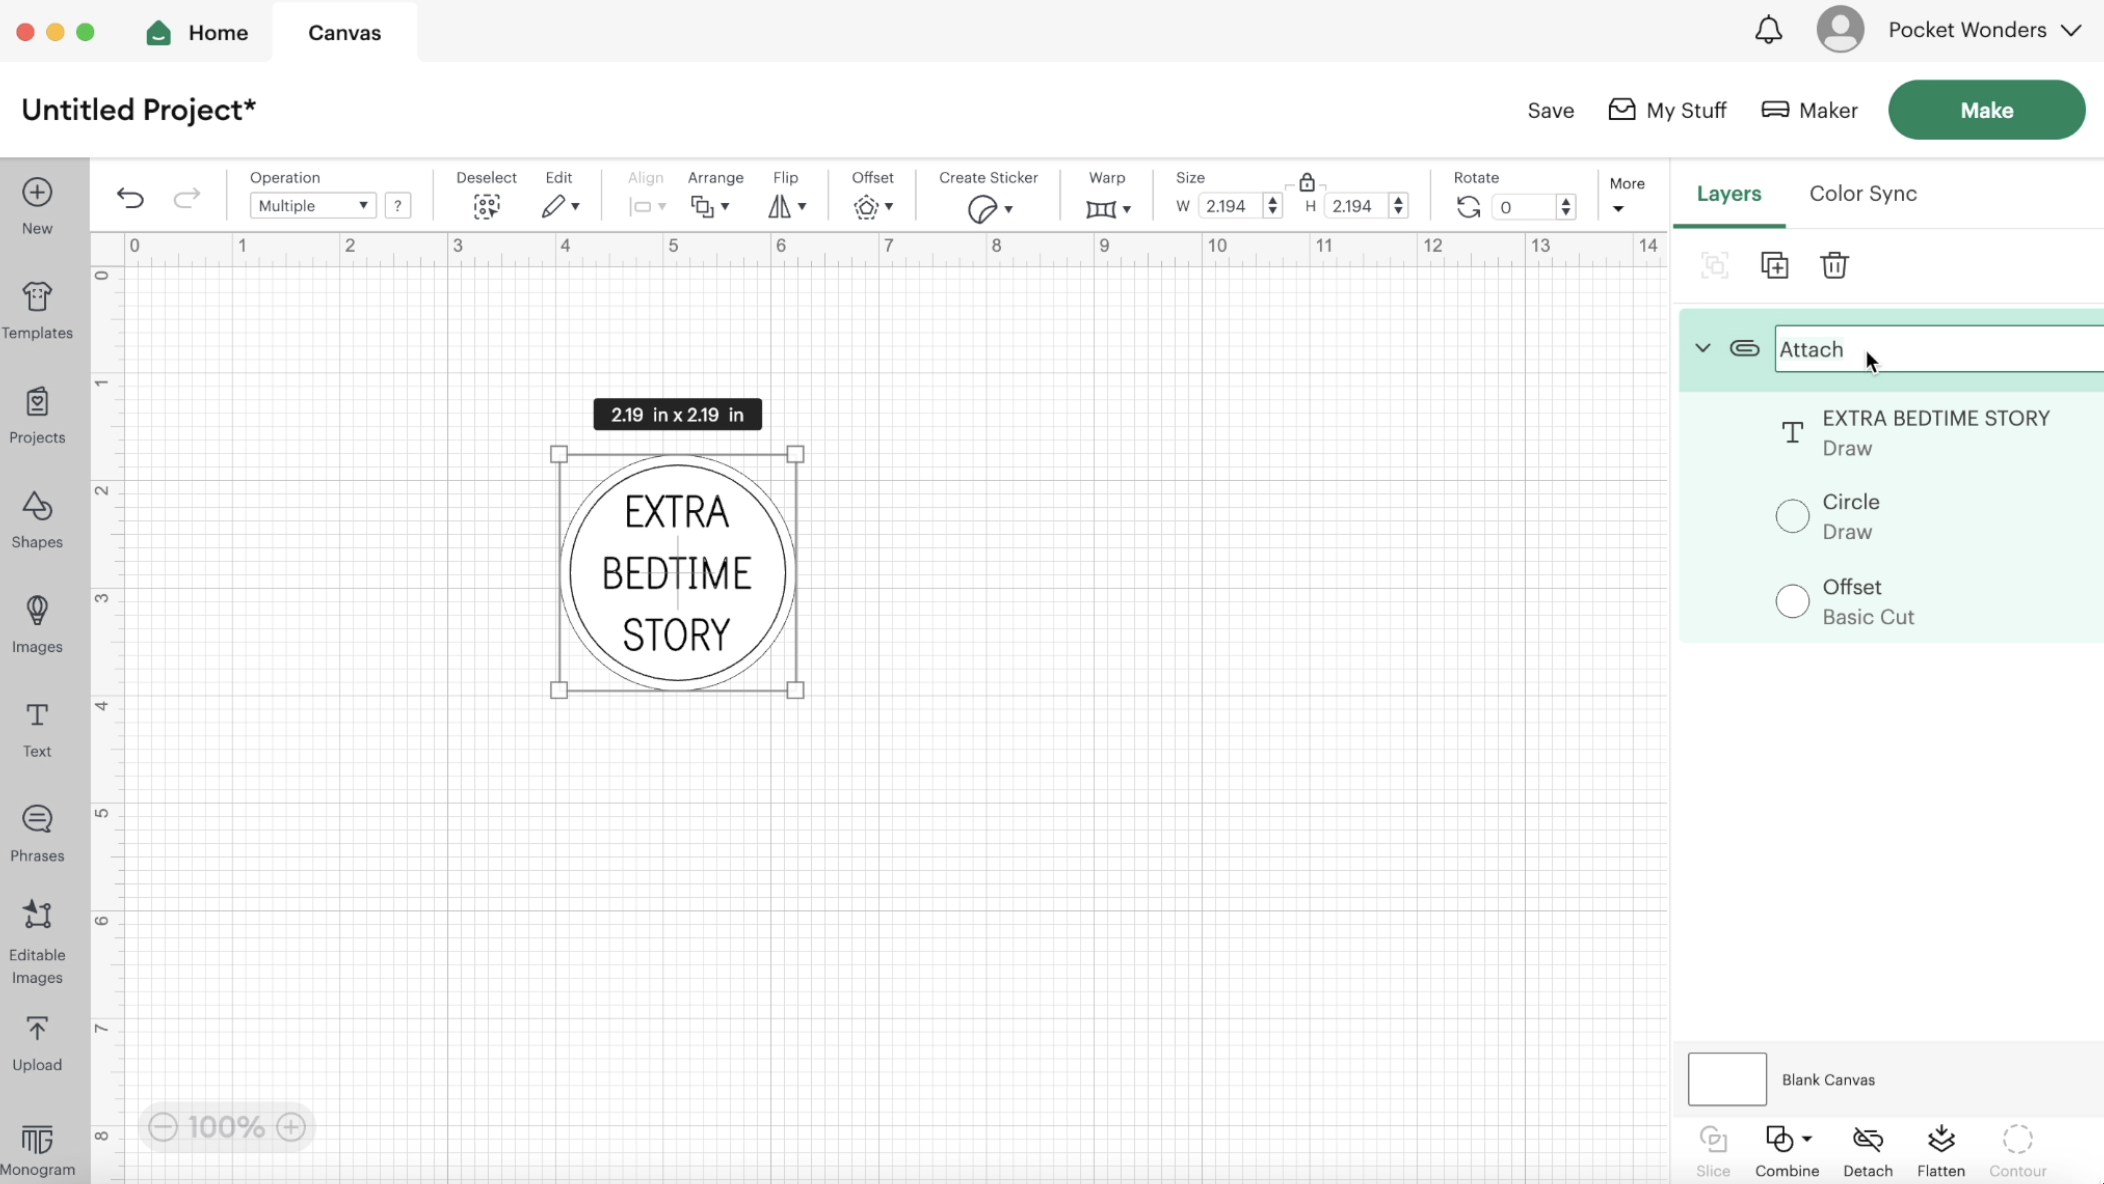
Select all of the layers. Attach the layers to create a group.
Rename the group for better organization.
Duplicate the token to make many more. If you are using the Cricut chipboard and your circles are 1.5″, you will be able to fit 36 of them on a sheet.
Change the text on the tokens using the list below.
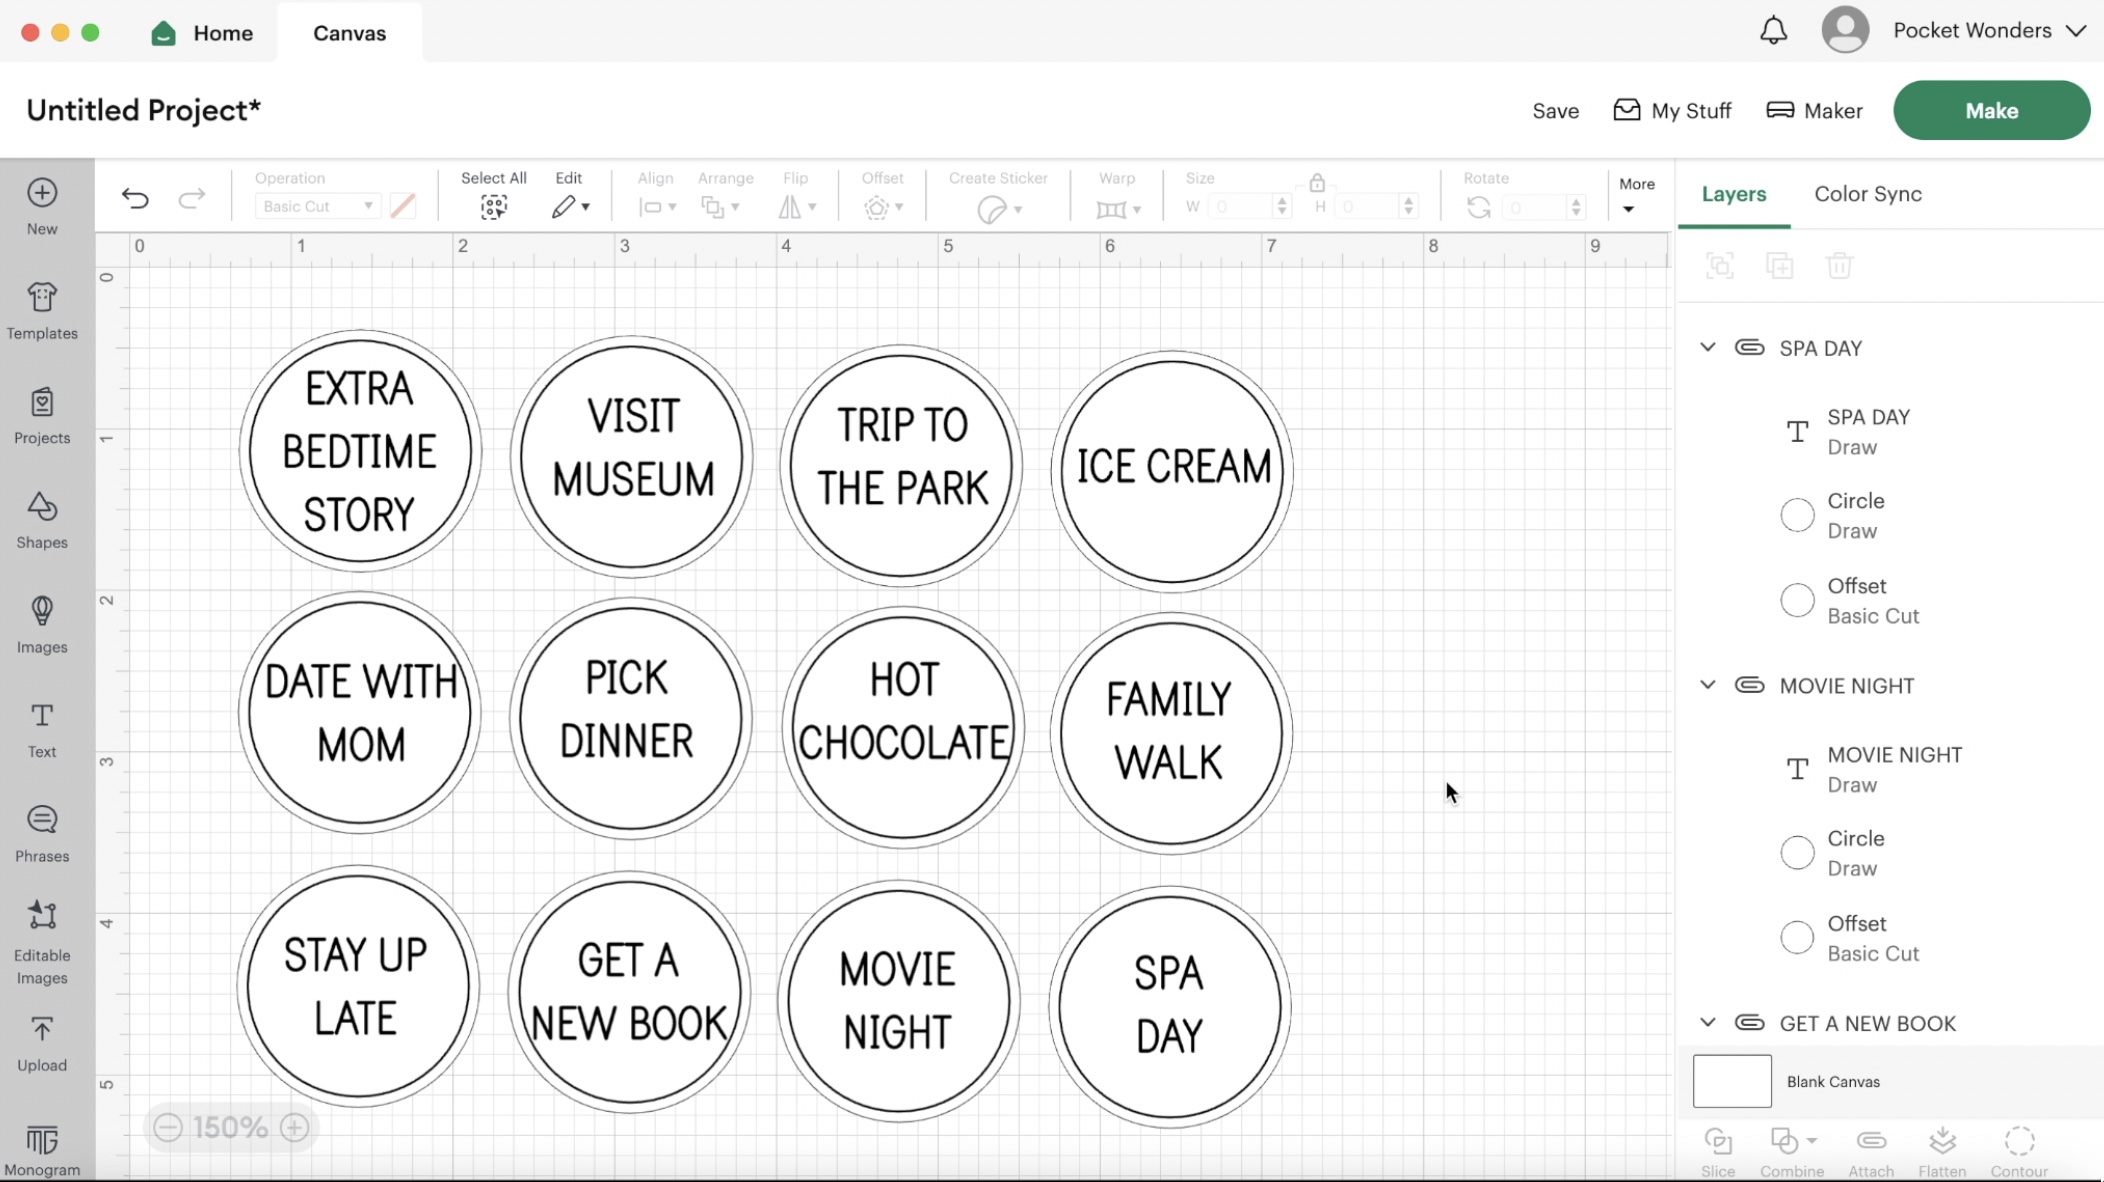
Re-center the text and double-check that all the text layers are on set to “draw” and not “basic cut”.
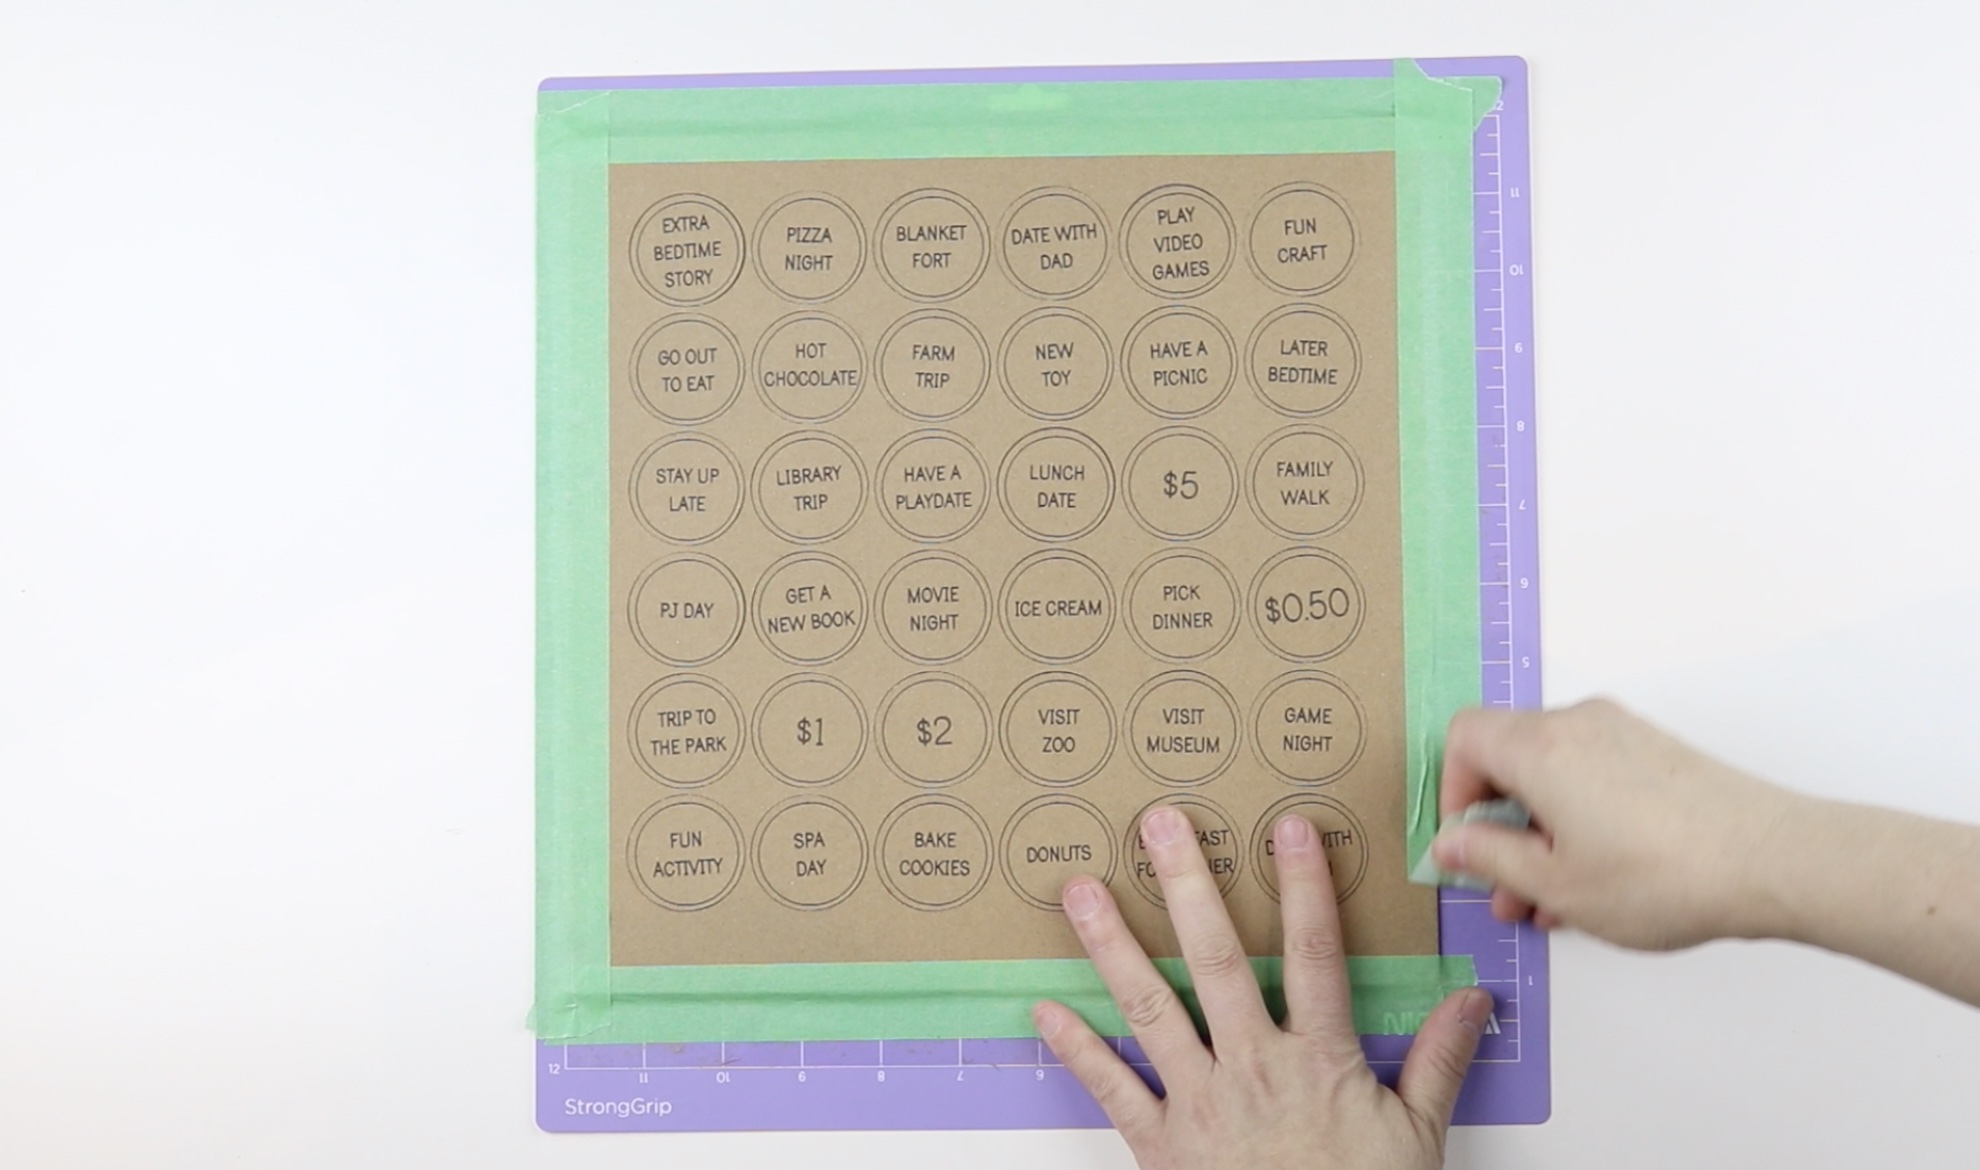
STEP 2: Prepare the mat
Place your cardstock or chipboard on your mat.
If you are using cardstock (Explore and Maker machines), use the Stand Grip mat and the fine point blade.
If you are using Chipboard (only for Maker machines), use the Strong Grip mat and the knife blade.
*Note that cutting it out on chipboard will take between 1-2 hours as it needs 12 passes.
If you are using Chipboard, be sure to follow the instructions from the Cricut cut screen and move your rollers all the way to the right as well as using painter’s tape to tape the chipboard to the mat before cutting.
STEP 3: Cut out the tokens and fill the eggs
Remove the painter’s tape and the tokens should pop off pretty easily.
Fill your easter eggs with them and enjoy!
Things you can put on your Easter Egg Tokens
- Game Night
- New Toy
- Breakfast for Dinner
- Pick Dinner
- Go out to eat
- Trip to the park
- Family walk
- Pizza night
- Stay up late / Later Bedtime
- Hot Chocolate
- PJ Day
- Movie Night
- Visit Museum
- Bake Cookies
- Money tokens (redeemable for cash $0.50, $1, $2, $5 etc)
- Donuts
- Fun Craft
- PJ Day
- Have a picnic
- No Chores Day
- Play Video Games
- Date with Dad
- Date with Mom
- Blanket Fort
- Get a New Book
- Lunch Date
- Ice Cream
- Visit Zoo
- Have a Playdate
- Library Trip
- Extra Bedtime Story
- Farm Trip
- Spa Day
- Fun Activity
- Candy Treat
- Family Adventure
- Screen Time
Related Articles